get 500+ free images, templates & marketing strategies! You're one click away, Don't Miss It.
Start a blog – the ultimate beginner’s guide
This post may contain affiliate links. Please read the disclaimer
Pick a Domain name – Start a Blog – STEP 1
The very first thing to do is choose your domain name. This is what your website and blog will be called. (example: myblog.com or my domain name is ivorymix.com).
You can read more here on how to choose a domain name and get the free printable worksheet to find a perfect domain that is right for you.
Buy your domain and host it – Start a Blog – STEP 2
Once you’ve decided on your domain name, you’ll need to check its availability, buy it, and set up the hosting for it. Setting up a web host with Bluehost gives you a place to store your blog and all your content on their servers. You can read more about how web hosting works here and get a simple checklist for comparing different hosts and what they offer.
To skip the comparison, I’d like to recommend you get your first blog hosted at bluehost. This is where my website is hosted and it’s extremely user friendly and budget friendly. In order to get a discount on your domain and hosting through Bluehost, you can click here.
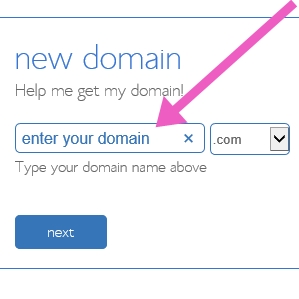
Enter your Domain Name – Then click next:
On the Bluehost website, navigate to the top bar and drop down the menu for Products and click on Domains. The window that comes up is going to look just like the image below. This is where you enter the domain you want to buy. Once you enter it in and click next, you will be sent to the section for setting up your really cheap account and picking your hosting package.
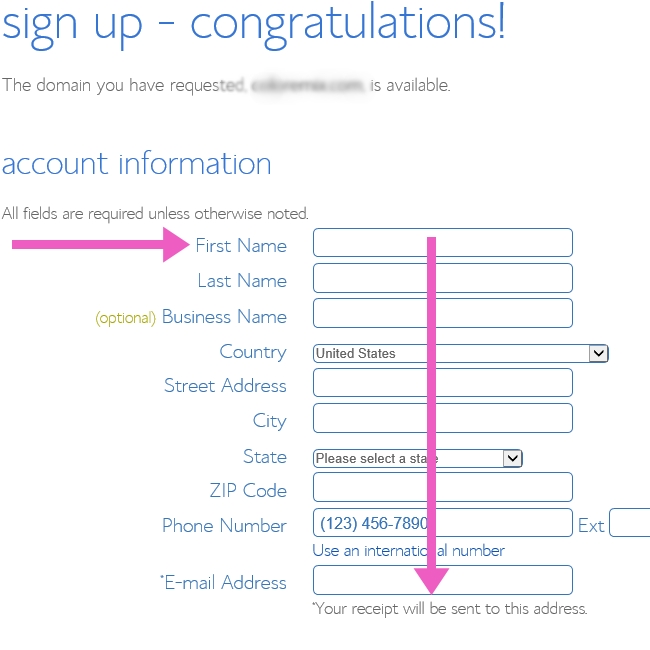
Fill in your account info – Scroll to the next part
This next part is important so that Bluehost knows how to contact you and bill you the small about their going to for the purchase of the domain and hosting. So, fill out the contact and information form and simply scroll down to pick a package for hosting next.
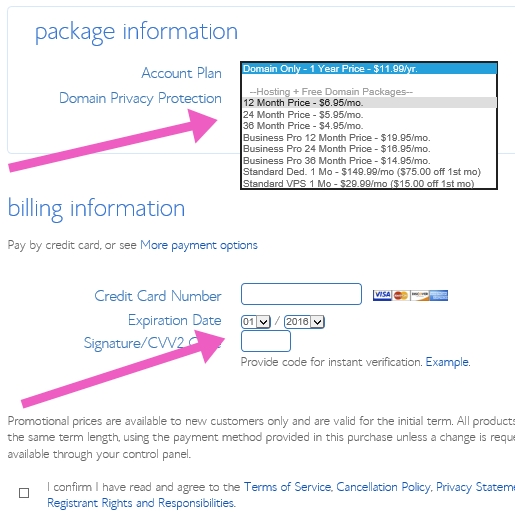
Pick Your Package – Scroll down to the next part
The next part before finalizing the buying of your domain and hosting it is choosing the hosting package. There is nothing wrong with choosing one of the starter packages because you can upgrade at anytime. Choose whatever seems appropriate for you and your budget, but don’t over commit yourself.
Enter your billing – Click submit!
Once you’ve picked the package, you only need to fill in those digits for your credit card and hit submit! It’s super easy and that simple!
Install WordPress – Start a Blog – STEP 3
Once you’ve completed steps 1 and 2, you will need to install WordPress. WordPress is a specialized program for managing your website. It contains easy to use tools for managing and creating your blog and website. Like I said, its user friendly, easy to use, and you wont need to know any code!
Use the username and password you set up and sign in.
Bluehost will go through some steps of verifying your email and getting you confimed. Once you’ve confirmed your username and password, go to the bluehost login screen and login.
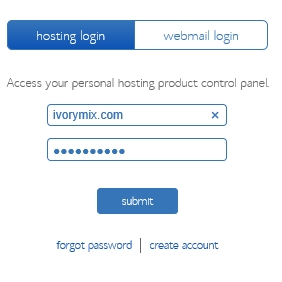
Once you login, you’ll be sent to you CPanel – Click on “Install WordPress”.
The CPanel and Bluehost home pages are where you will manage everything related to your bluehost account and your website. From this dashboard and CPanel, you can find links to more tools than you may ever use.
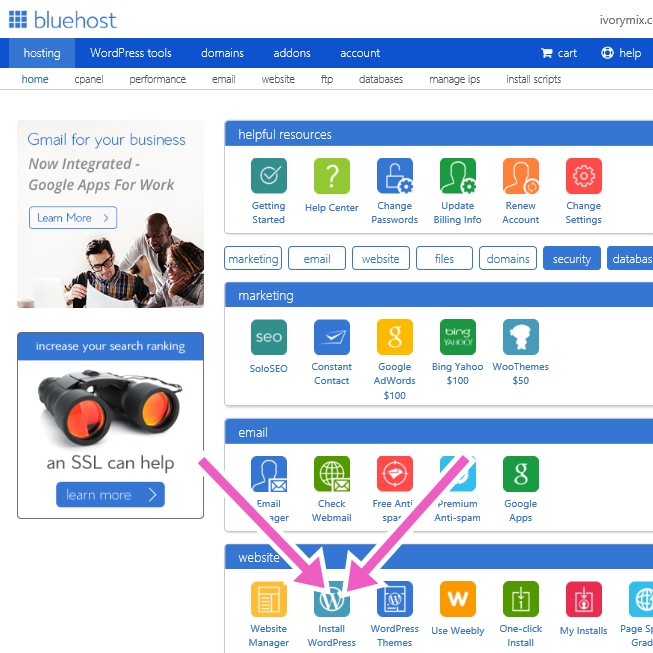
The window that comes up next gives you options for paying for someone to set up your wordpress for you, but its so easy, you probably wont need that. You can just click INSTALL because doing it yourself is easy and free!

You’re almost there! Just finalize this last step by filling in your site name and username and password information.
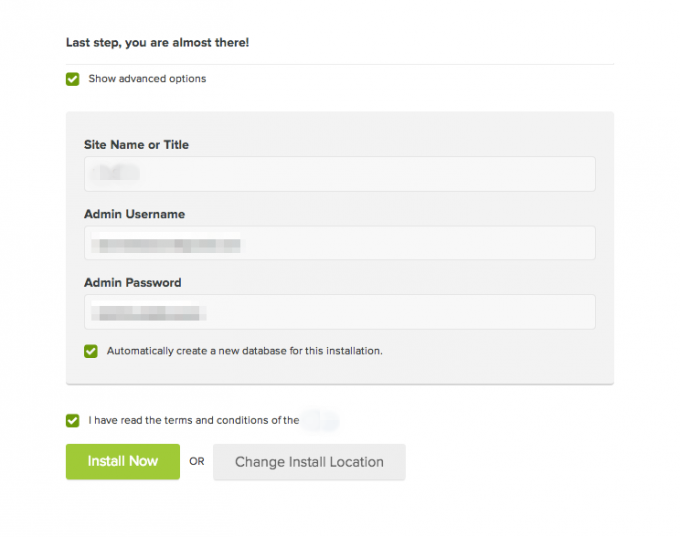
Once you’ve completed the final step, follow a link in your email to login to wordpress.
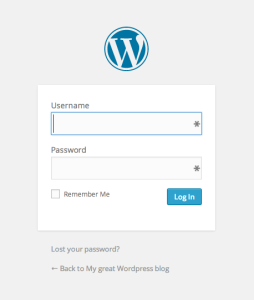
Blue host is going to email you a link to login to wordpress. Click on the link in your email to login and you should see the screen pop up like it is shown below. Fill in the admin username and passwords that you set up previously.
Are you interested in learning more about blogging? Learn more about blogging with these next steps in starting a blog:
Maybe you’ll want to pick a niche market for your blog too.
Design a logo you love and will be proud of
Create some design elements and organize your blog
Make sure you establish a beginner blogger schedule for content creation and social media
This checklist will help you before you publish your first blog article.
Don’t forget to set up a Pinterest account to create traffic and a place for people to find your blog easily
Consider different Plugins and Widgets to make your blog easy to share on twitter and facebook too
Learn exactly how to create opt-in’s and collect email’s from your audience so your can send them emails and newsletters
You’ll probably want to bookmark this page so you can eventually automate the rest of your blogging and life too

Included Free:
550+ Templates, Photos, & Strategies
Get New Free Downloads Monthly
Unlimited Downloads
Special offers & Trends Newsletter
Save and sort your favorites
Access 500+ Free Templates, Photos, & Strategies With A Free Account
Free User Creation for Popup
By creating an account, I agree to Ivory Mix's Website terms, Privacy Policy and Licensing Terms
Already have an account? Log in


