get 500+ free images, templates & marketing strategies! You're one click away, Don't Miss It.

Included Free:
550+ Templates, Photos, & Strategies
Get New Free Downloads Monthly
Unlimited Downloads
Special offers & Trends Newsletter
Save and sort your favorites
Access 500+ Free Templates, Photos, & Strategies With A Free Account
Free User Creation for Popup
By creating an account, I agree to Ivory Mix's Website terms, Privacy Policy and Licensing Terms
Already have an account? Log in
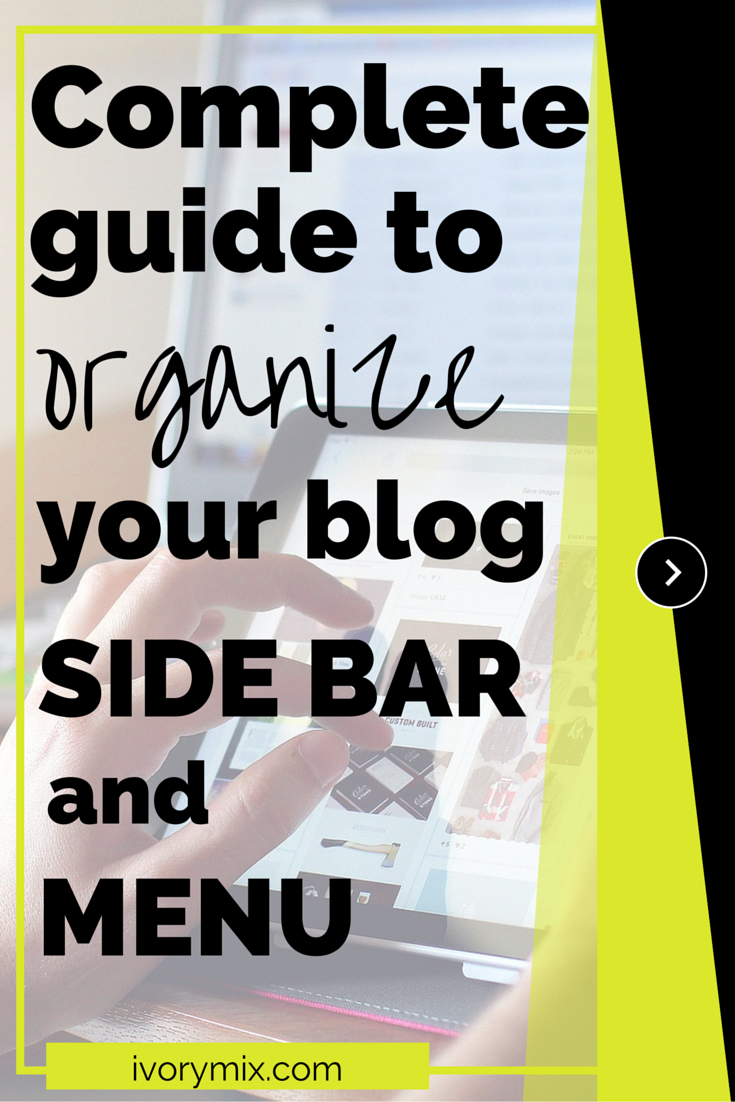
Complete guide to organizing blog menus and side bars
This post may contain affiliate links. Please read the disclaimer
There is so much that goes into building a website and organizing blog content! If you’ve just started your blog, you’re probably going a bit crazy trying to learn everything you can. You’re not only challenged by the time it takes but also deciding…. ” what do I actually implement and when?”
If you haven’t bought your domain or started your blog, but are seriously ready to, read this to begin.
There really is something to be said about every piece of your blog. I could create a blog article explaining the ins-and-outs of each element (which I just may end up doing overtime! haha). But, let’s take a chill pill for a moment and get down to the brass tacks. One of the first things you are going to want to do once your website is established is organizing how you display content.
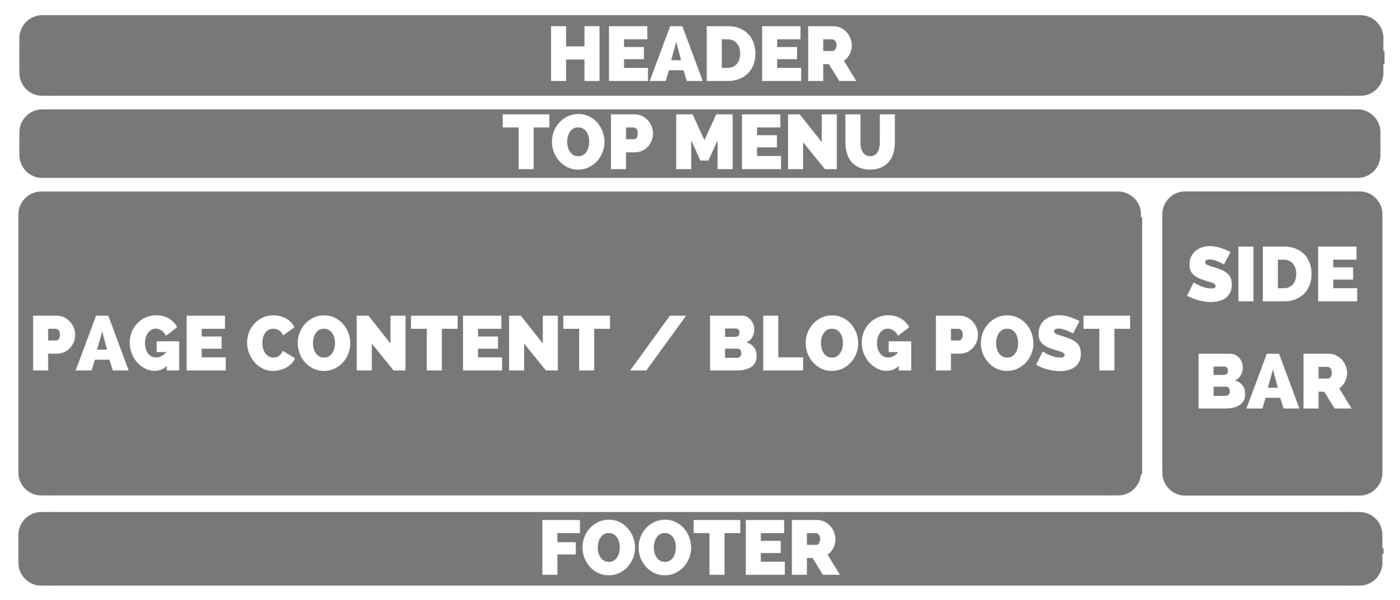
Most websites and blogs have four main areas. These can be set up to show on every page or post, but they can also be set up to disappear on certain pages. For instance, a sidebar may be appropriate when a reader is on a blog post article, but I don’t necessarily want it showing when a reader is on my “about” page. These decisions are a personal choice and can depend on your chosen blog theme, your individual style, what you are trying to accomplish with your blog, and your type of reader.
The Four Key Areas of a Website:
No. 1 – Header + Top Menu Bar
No. 2 – Side Bars
No. 3 – Content / Blog Posts
No. 4 – Footer
Now that you have a good understanding of the key areas to a website, you’ll want to decide how you will fill those areas, what colors they should be, what fonts to use, if you want your sidebar on the left, on the right, or on at all. If you’re not a web designer and a true beginner with your blog, you’re probably wondering how exactly you’re going to do all of that.
The best place to start is by choosing a theme. You can choose a free theme fairly easily from the “Appearance” section on your WordPress sidebar under “Themes”, and many of the free themes offer some customization options for fonts, colors, and location of certain elements. These free themes do have limitations for customization, but as a beginner, this would be a great place to start.
Pick a theme and customize your blog:
The great thing about WordPress is that you can pick a theme and customize it without implementing it. You can also choose to implement or re-implement any of the themes you have previously customized at any time, and it will remember your settings from your previous use of it. This makes it super easy to test different themes out, and to see if it will work for you.
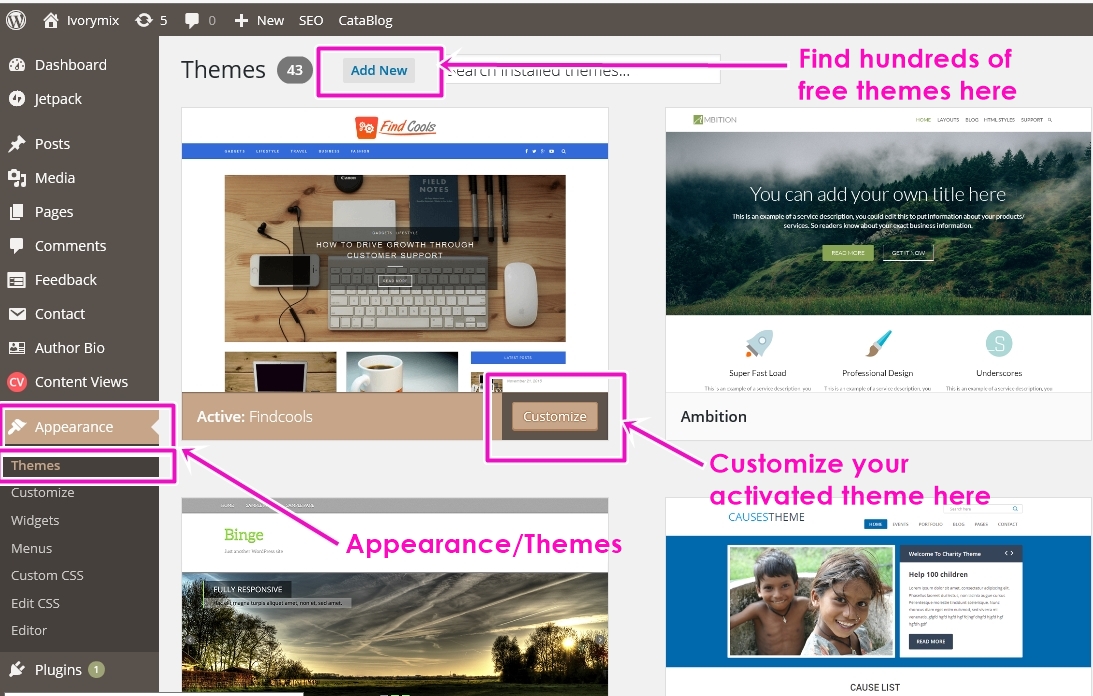
In order to pick a theme and customize it, you should go to your WordPress dashboard and choose APPEARANCE>THEMES>ADD NEW as seen in the screenshot below.
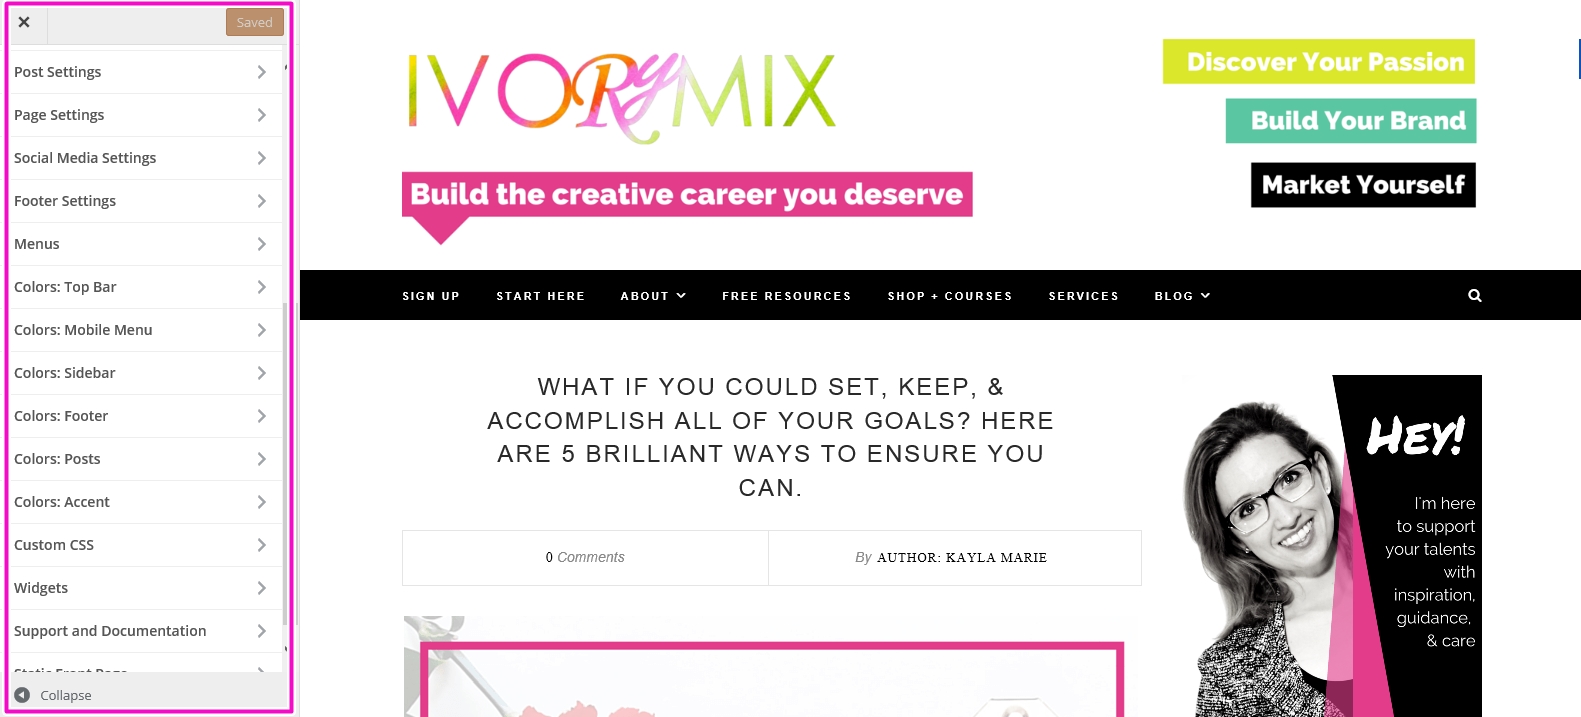
Like I said before, FREE themes do come with customization options, but they are not necessarily fully customizable and every theme is different. So, once you’ve found a theme you want to customize, you should check out the customization options. See the screen shot below. This is the customization dashboard that will come up. The items on my sidebar will be different than the items you can customize on yours. The reason for the difference is because we aren’t using the same themes and like I said before, Free themes come with their own settings for customization based on what the developer has decided to allow you to customize.
Organize your blog content:
Once you’ve chosen your theme, you should establish how you’re going to organize each of the key areas on your blog (header, sidebar, footer, and content). If you are just beginning, you probably don’t have any blog content, categories, pages, or tags yet. So, it might be difficult to organize things that don’t exist. It’s a good idea before you decide on how to organize your blog, that you do have some content already or at least an idea of what your content will be. Then you should create some “blank” pages and posts to start on this next step.
Create a Header:
A header typically should include your logo and blog name, a tagline or call to action, and the menu/directory for your blog. Below are some examples from popular bloggers who have these elements (plus some additional things that work for them but aren’t necessary).
By Regina / Example Header

The Nectar Collective / Example Header

XO Sarah / Example Header
![]()
You’ll see that there are multiple ways to make your header, but there are common elements that run through all of them. You can usually modify your header within the “Customize” section of your theme. See the screenshot below, but keep in mind that your exact them customization menu will look a little different than mine.
![]()
Upload your Logo or a full-size header image by clicking on “Change Image” (remember that your theme customization may be slightly different)
Organize your Blog’s Top Menu:
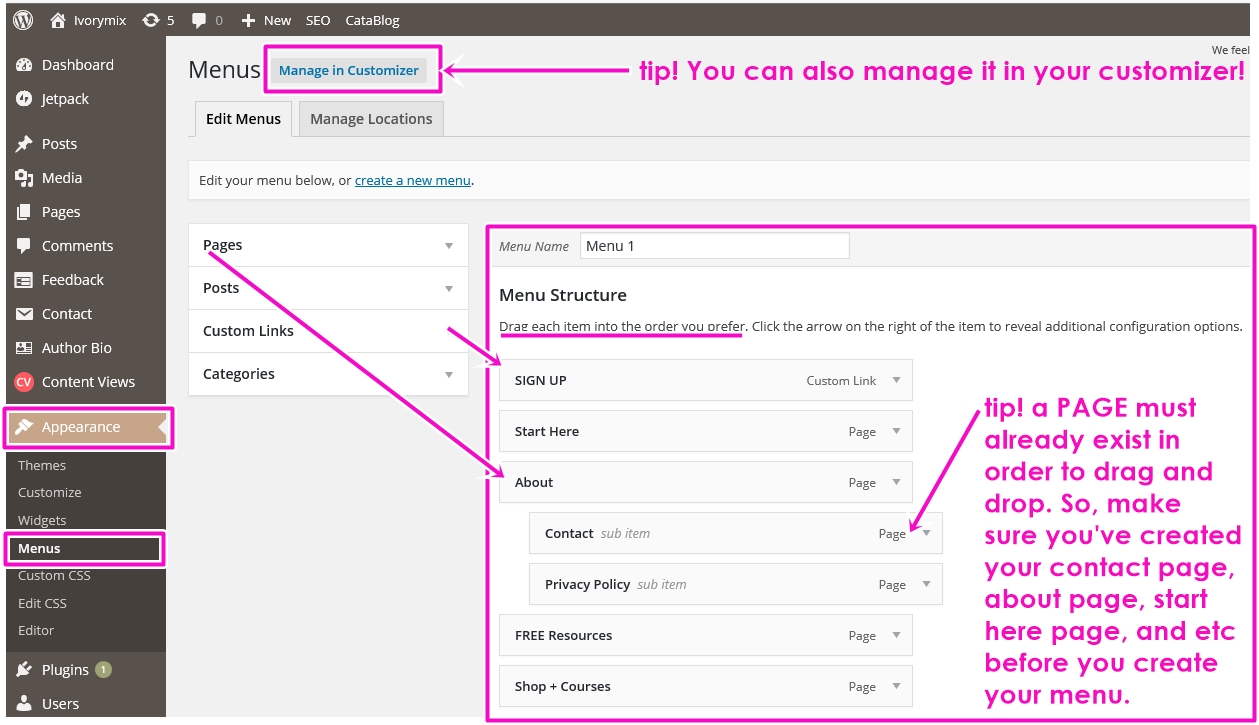
You can modify your top menu within your WordPress dashboard under APPEARANCE>MENUS. WordPress makes this very user-friendly so that you can simply drag and drop different elements into your blog menu. TIP: You don’t have to make your menus through the WordPress dashboard though. You usually organize your menus in your theme customizer too.
In order to help readers navigate your blog, you should keep your menu clean and simple but maximize it to your benefit too. That being said, the common elements of your top menu should include the following:
Blog (Sometimes referred to as “home”) – This takes readers to your blog POSTS. You may even have this be a drop-down menu showing all of your blog categories.
Start Here (Sometimes referred to as “home” as well)- This may be a PAGE containing information that the blogger wants to convey to their readers about how to navigate their blog and find information. Its kind of like an about page, but I explain more here so you can understand the difference.
About / Bio – Usually a PAGE, this describes you or your business and gives a reader the background information they are looking for. Read more here to find out how to create your about page.
Contact – Also typically a PAGE and not a post. This can contain a contact form, your email address, or a sign-up form. It gives readers an opportunity to send you a message and make contact.
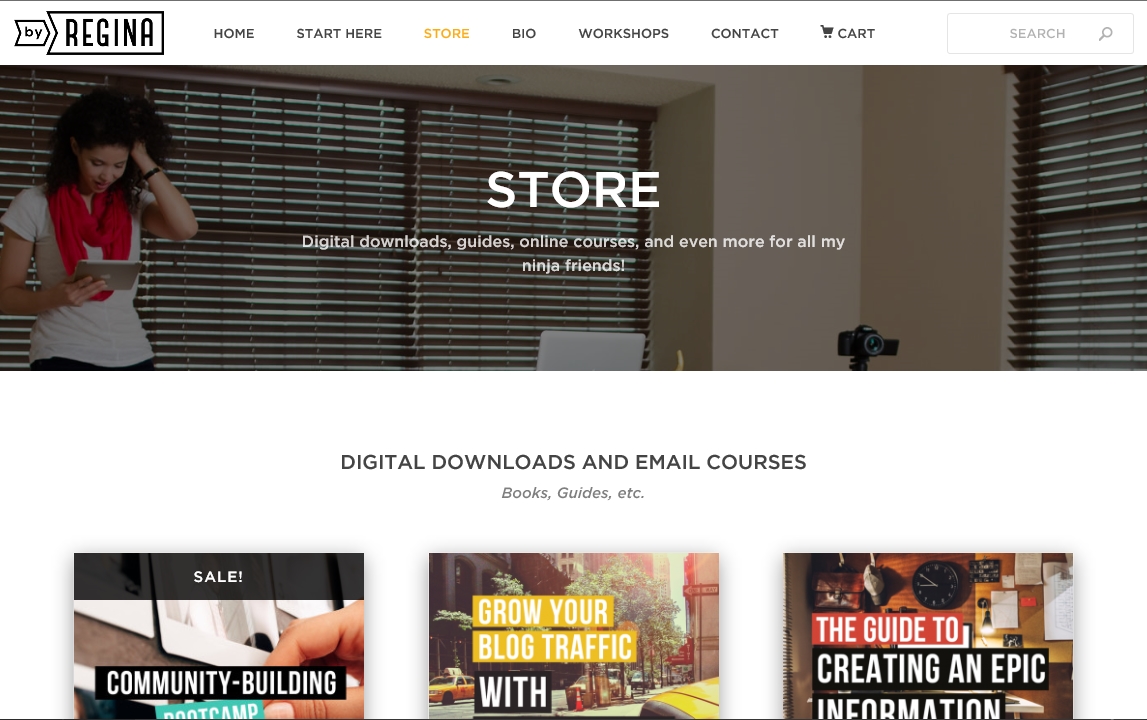
Additional services or shop – This is only necessary if you plan to sell products or offer services. There are multiple ways to accomplish this and choosing the right theme(possibly from woocommerce) from the beginning will help you create pages and menus for your shop easily. However, this can also just be a PAGE containing links to your Etsy shop or a PAGE containing a few PayPal buttons with pictures of your products or services. A great example of this is from By Regina.
Last but not least for your top menu is something I’ve seen done successfully but not everyone does it. Add a popular post or series to your menu. If you are conducting a regular series of blog posts, a special event, or some kind of item that you want your readers to pay close attention to when they come to your site, then you may create a link on your menu specifically for that. It should have a catchy but short title though and should be something fairly popular on your blog that gets a ton of traffic. The reason I say that is because your menu and top bar are PRIME blog real estate. Don’t put up unpopular links or long-winded titles in your menu that people won’t click on.
Make a Simple Sidebar on Your Blog:
I have a sidebar next to this post right now. You should check it out a notice some of the things I have here and how I’ve organized it.
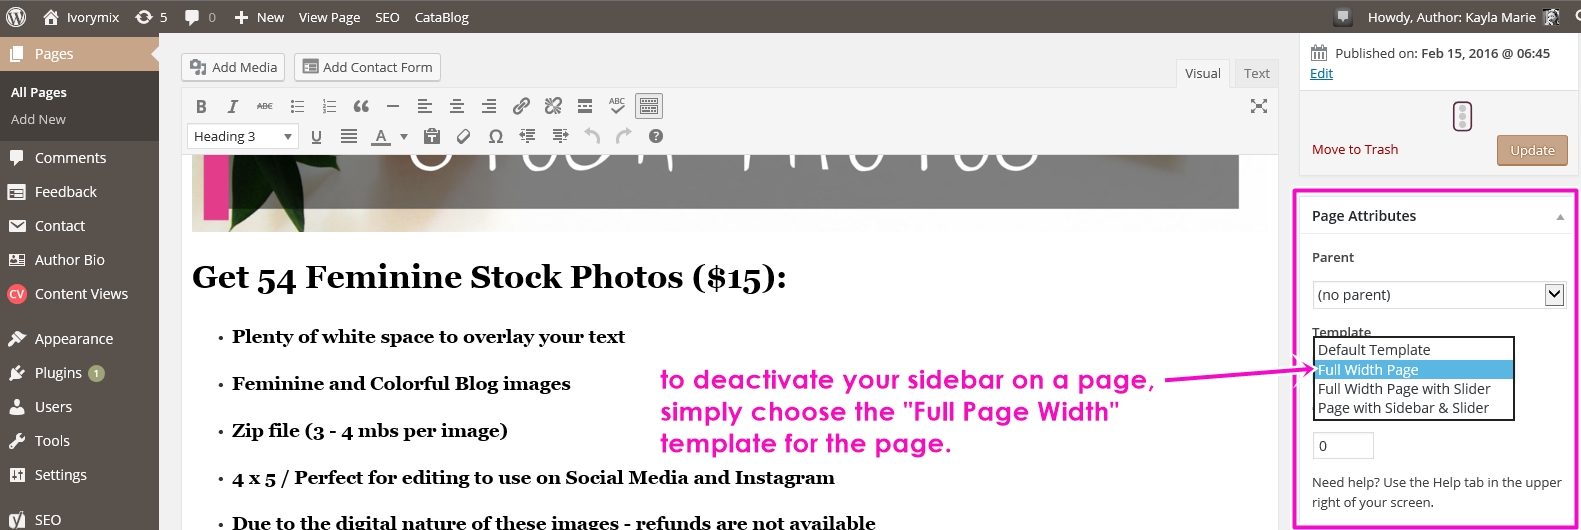
Now that you’ve done that, you may have noticed on the above example, on By Regina’s shop page, that she didn’t have a sidebar. That’s because a sidebar is great for some instances but not all. If you have a shop, like Regina, you probably want your readers to simply really focus on what you’re selling. In that case, keep your page simple and deactivate your sidebar on your page. See below for how to deactivate a sidebar on one of your blog pages.
A sidebar can be a distraction or it can be a tool. The reason that bloggers often include a sidebar within their blog article pages is that it is a great way to get people over to another thing to read or do. The purpose of that sidebar is to call your readers over to another thing they may be interested in.
You do want your readers to poke around, don’t you?
It makes a great place to highlight your different blog categories, the social media links where people can find you on twitter and Pinterest, and possibly some ads for products you love and want to share. In order to create your side bar, you will need to navigate to APPEARANCE>WIDGETS through your WordPress Dashboard.
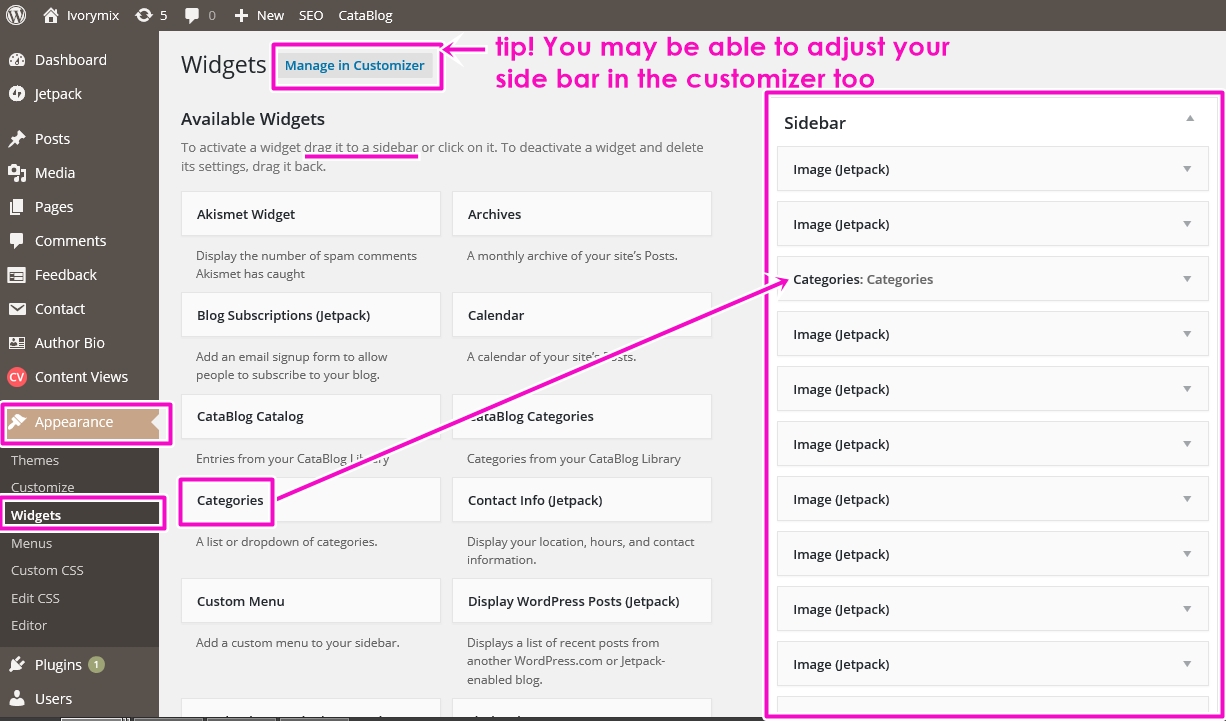
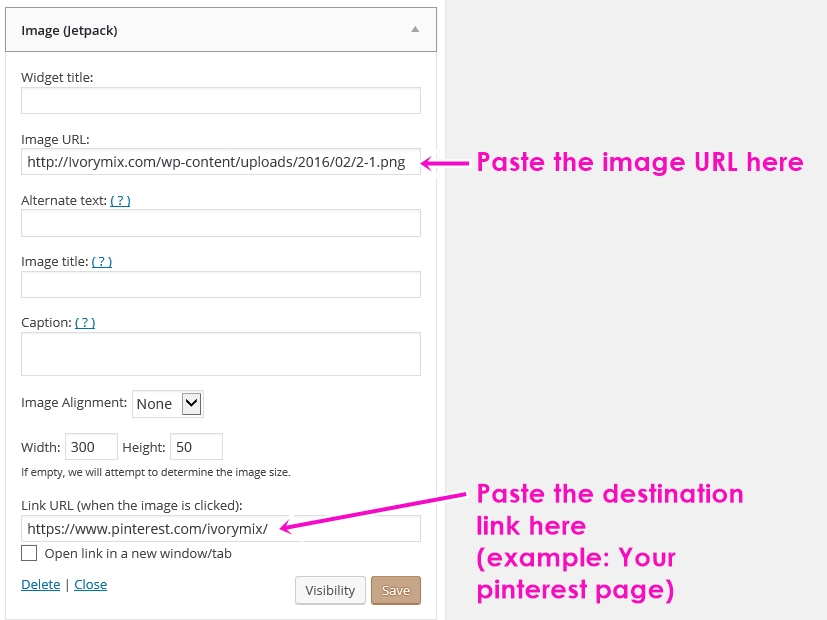
A sidebar can be customized in multiple ways. Images, links, HTML code, plugins, and the list goes on. You’ll notice on the above image that my sidebar includes a lot of images. The thing is that they aren’t just images. They are images that you can click on and it will take you to a link. For instance, I’ve created custom buttons for my social media links. Once I uploaded the button image into the media section of my word press, it gives a URL.

The above image shows how to grab a link from an image that you upload into your WordPress media center.
Now that you know how to do some customization on your blog side bar, you can start to organize it. Here is a simple list of how a successful blog sidebar might be set up.
Image with a link to your about page – show them what your about before they read it.
Social media icons with links to your different account pages – this allows your readers to find you on their favorite social media sites too
A short list of blog categories – keep your categories simple
Sign-up form – provide another place for readers to sign up for your newsletter
Ads for products you love – thinking about monetizing your blog? Consider activating the google Adsense plugin and get simple ads and widgets for your sidebar.
Popular Content from your blog – if you really want people to continue to read your blog, offer them a glimpse into what other people are finding interesting on your blog. Appealing images and catchy titles should do the trick and get them to click!
Utilizing Your Footer:
A footer should be kept simple but not entirely blank. Some FREE themes have customization of the footer and some limit anything in your footer at all. It’s all based upon your theme choice and your personal preference. If you do have a footer, you should consider keeping it simple but adding links to items that people might look for once they’ve skimmed through your page. Or consider adding all of those unsexy things like a “disclaimer” or a”Privacy Policy”.
Here some footer items you can start with as a beginner:
Social media links – more links to your social media pages.
Privacy policy – check out my privacy policy for an example of what one is. Feel free to copy and modify it for your use.
There you have it! You’ve read through some organization tips for your blog and should have a better understanding of how to navigate wordpress and customization. If you feel confused still, I’d encourage you to reach out to me at kaylamarie@ivorymix.com or sign up for regular updates from Ivory mix. I continue to share blogging, business, career, and marketing tips weekly.
Included Free:
550+ Templates, Photos, & Strategies
Get New Free Downloads Monthly
Unlimited Downloads
Special offers & Trends Newsletter
Save and sort your favorites
Access 500+ Free Templates, Photos, & Strategies With A Free Account
Free User Creation for Popup
By creating an account, I agree to Ivory Mix's Website terms, Privacy Policy and Licensing Terms
Already have an account? Log in