get 500+ free images, templates & marketing strategies! You're one click away, Don't Miss It.

Included Free:
550+ Templates, Photos, & Strategies
Get New Free Downloads Monthly
Unlimited Downloads
Special offers & Trends Newsletter
Save and sort your favorites
Access 500+ Free Templates, Photos, & Strategies With A Free Account
Free User Creation for Popup
By creating an account, I agree to Ivory Mix's Website terms, Privacy Policy and Licensing Terms
Already have an account? Log in
The art of sending an opt-in using MailChimp
This post may contain affiliate links. Please read the disclaimer
What is one buzzword in blogging that you hear all the time? Opt-in. An opt-in is a free item that bloggers and business owners develop specifically for their audience, but that is only given out in exchange for your email address.
Examples of Opt-in’s
Printable (checklist, recipe, workbook, etc…)
A secret piece of information
An email course
Stock Photos (like these ones here)
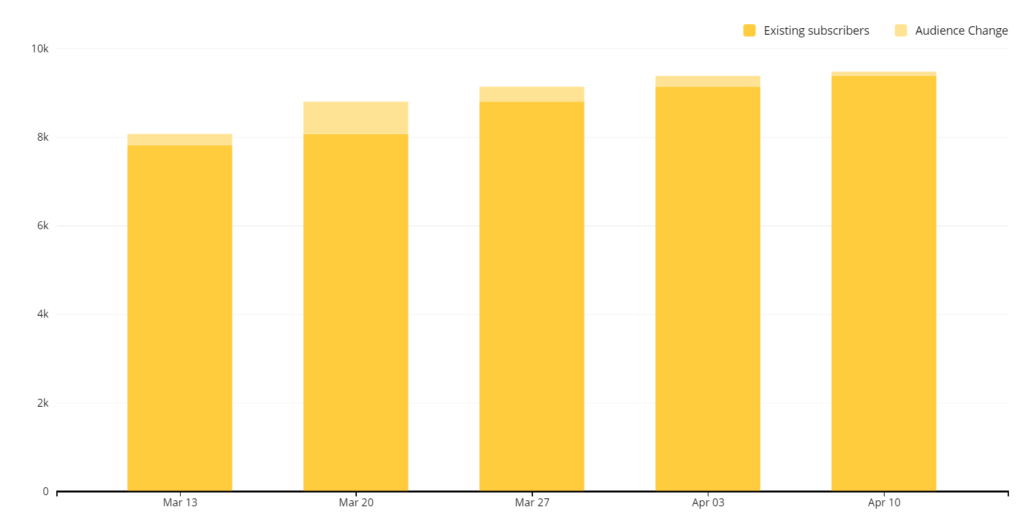
I gain anywhere from 30-100 new subscribers everyday by creating and sharing opt-ins on my blog. Here’s a snap shot at my growth over a 5 week period:
Many email newsletter services that are free work the same, but this tutorial is specifically about how to achieve this exchange of opt-ins using the welcome emails from the specifc free email service mailchimp. Once you have a mailchimp account set up and an opt-in or a freebie ready to give away, this 5 minute task is exactly how you can collect emails and delivery your freebie with a welcome email at the same time. Although there are a few steps, it really won’t take you long.
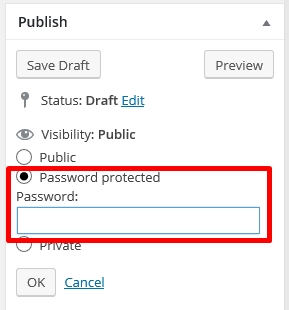
STEP 1
Create a password protected page or post in your blog and make sure you put your freebie on this page. This is where your reader will finally go to download the document(s).
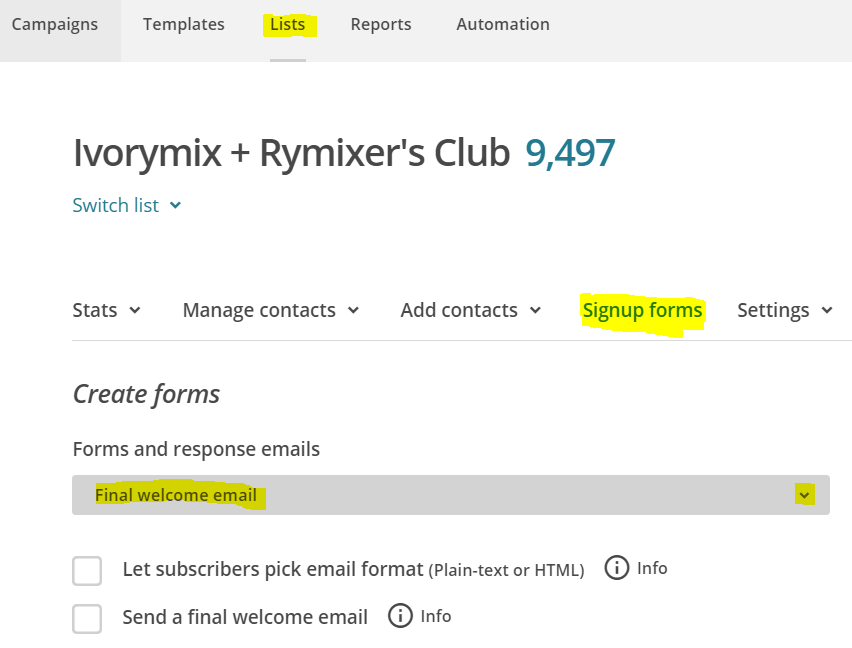
STEP 2
Go to your mailchimp account and create a “Final Welcome” email that will get sent to any new subscribers. Make sure you put a link to your NEW password protected freebie page and the special password in your final welcome email. This is what gets sent to your new subscriber telling them where to go to get their freebies.
STEP 3
While on your mailchimp account still, go copy the link to your general email sign up form.
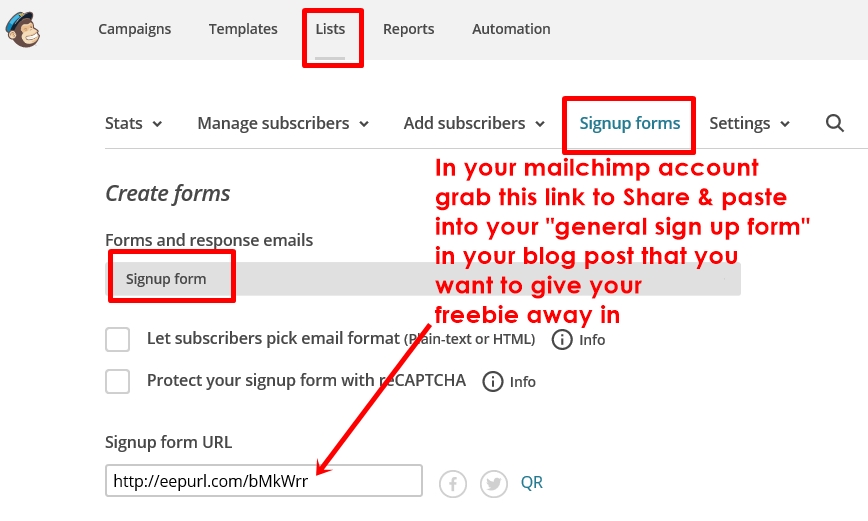
STEP 4
With the link copied, go and paste this link for your general email sign up form into the blog post offering your reader this freebie. You can paste the link on an image or just as text.
If you have any questions about this process, please ask in the comments below.
Included Free:
550+ Templates, Photos, & Strategies
Get New Free Downloads Monthly
Unlimited Downloads
Special offers & Trends Newsletter
Save and sort your favorites
Access 500+ Free Templates, Photos, & Strategies With A Free Account
Free User Creation for Popup
By creating an account, I agree to Ivory Mix's Website terms, Privacy Policy and Licensing Terms
Already have an account? Log in
8 Comments
Leave a Comment
You must be logged in to post a comment.


 (1)")


I’ve been wondering how I can set up a MailChimp opt-in for a while. Thanks for making such a clear outline and sharing your results with the method 🙂
Thank you so much for such clear instructions! Your genuine willingness to help us new Bloggers is immensely valuable. Your Facebook Group is the one I have learnt the most from.
Jimena, you’re so kind. It’s my pleasure to help!
This is super helpful! I was wondering if there’s a way to take this a step further?
Is it possible to give away many different options without making different lists every time? For example:
User signs up for worksheet A using form A and is automatically delivered worksheet A.
User B signs up for worksheet B using form B and his automatically delivered worksheet B.
Both users become members of the main email list.
Is this even a thing?? Would so appreciate your help!
Yes Sarah. Using a different sign up form, like Mail Munch, you can set it up to put your subscribers on the same list and then be sent to a page after sign up. The link to this final page can the URL to something you’ve uploaded to your media files.
Thank you so much! Totally checking out Mail Much. Looks awesome! Thanks again 🙂 Happy Monday!
Thank you for all the images. I need that to help me set up MailChimp. This is exactly what I have been looking for!
Great! I’m glad it helps