get 500+ free images, templates & marketing strategies! You're one click away, Don't Miss It.

Included Free:
550+ Templates, Photos, & Strategies
Get New Free Downloads Monthly
Unlimited Downloads
Special offers & Trends Newsletter
Save and sort your favorites
Access 500+ Free Templates, Photos, & Strategies With A Free Account
Free User Creation for Popup
By creating an account, I agree to Ivory Mix's Website terms, Privacy Policy and Licensing Terms
Already have an account? Log in
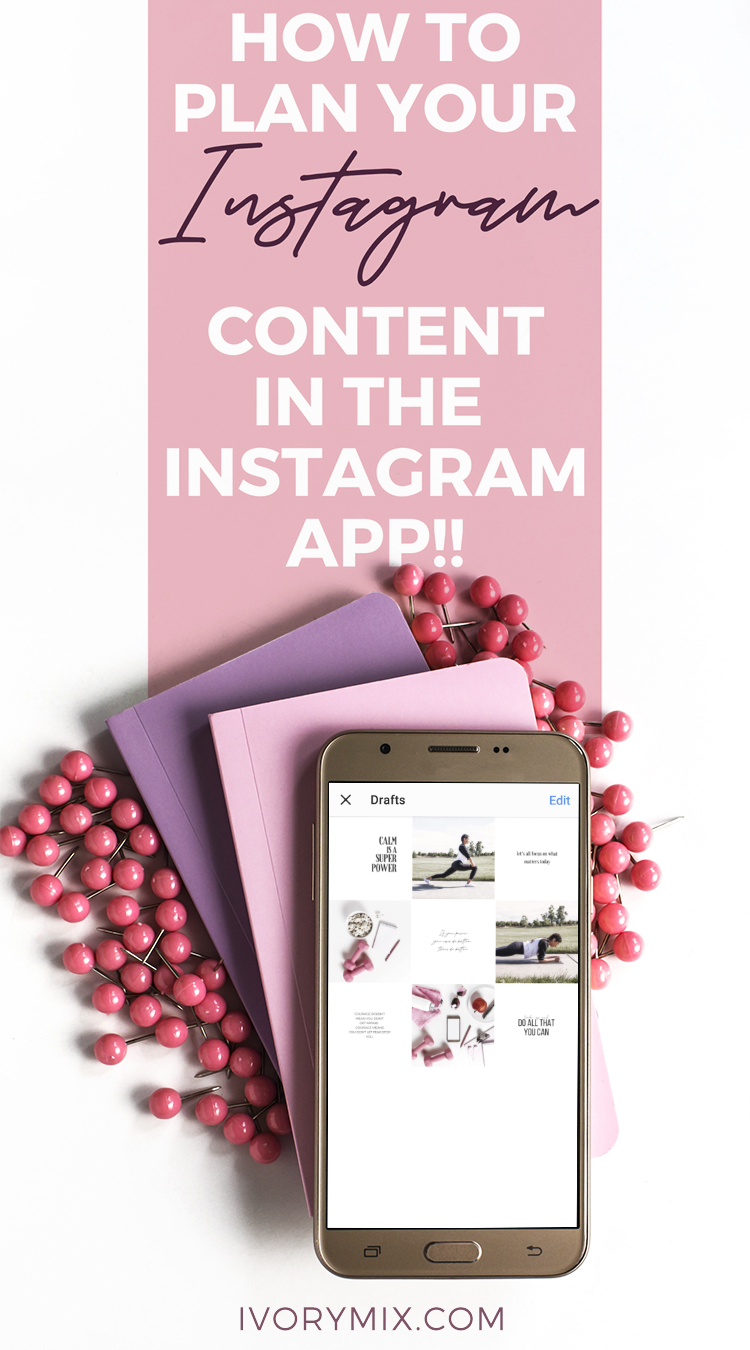
How to plan and preview your Instagram content in the Instagram App
This post may contain affiliate links. Please read the disclaimer
I am so done uploading new apps to my phone! I don’t know about you, but because of the industry we’re in, it seems I can’t get enough space on my mobile devices. From downloading images and apps to taking new images and sharing them, my phone is used a lot.
…and it get’s bogged down. When my phone or computer run slow, I run slow and my mind becomes bogged down.
This tutorial shows you how to plan and preview your grid and Instagram content in the Instagram App
With speed and minimalism in mind – today, I’m going to show you how you save space on your phone and in your mind by planning and previewing a week of Instagram content ahead of time (with captions and hashtags too!) without adding any new apps to your mobile devices or social media strategy.
I just know the minimalist in you is delighted to hear you can do this, but I sense some doubt.
I’m Serious! You can plan your content on the go or ahead of time right inside of the native Instagram app. No third party tools.
Let’s get started…
Things to have before you can plan & preview your content in the Instagram App…
There are a few things you should have before you start to plan your content inside of the app.
• Have photos and content ready. Click here to grab free access to our free library of 350+ stock photos.
• Have customized and edited your photos and content to match your brand. Click here to learn how to customize colors and more in stock photos.
• Have created a strategy for the types of content and captions. Click here to create an Instagram content calendar in 8 steps.
• Have an idea of the captions and hashtags you’ll use. Click here to learn more about captions on Instagram
Once you have your content and captions somewhat planned, you have to get them on to your phone. I use Dropbox cloud storage to move images between my computer and phone, but you can always email attachments to yourself too.
Plus, if you do email your photos to yourself, you could include your planned captions and hashtags in the body of the email. Just consider it another way to avoid downloading any additional apps.
Want to skip ahead? Watch the video tutorial instead:
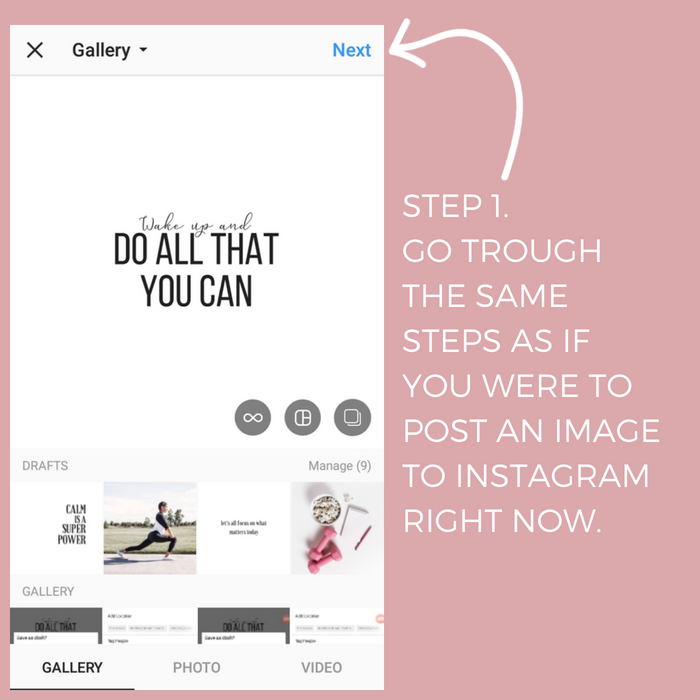
Step 1. Start the process of posting your first Instagram post
But don’t hit “share” just yet! Your first step is to “pretend” like you’re about to share something on Instagram, but you’re going to stop right before you hit share.
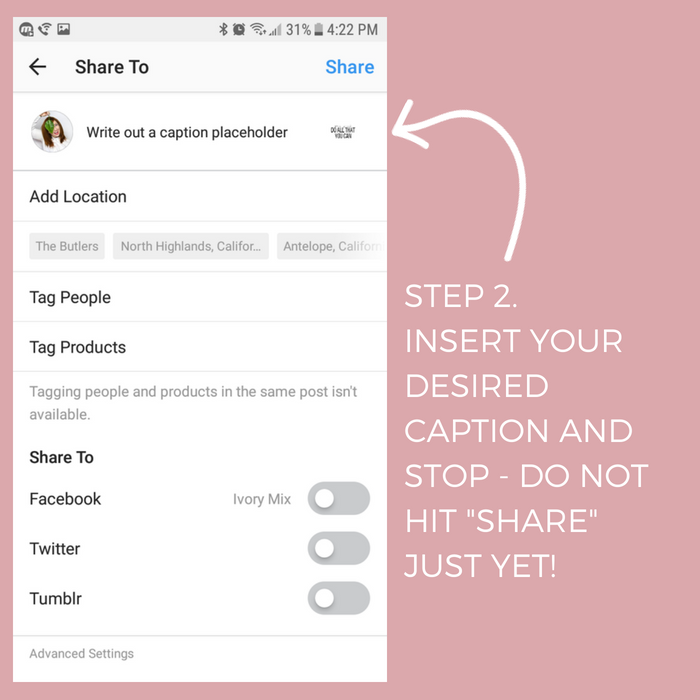
Step 2. Make sure to add a caption – even if it’s a placeholder!
It’s not important to know exactly what you want to say but it is important to place some kind of text in the caption field. By doing this, it triggers the app to help you save this post as a “draft”
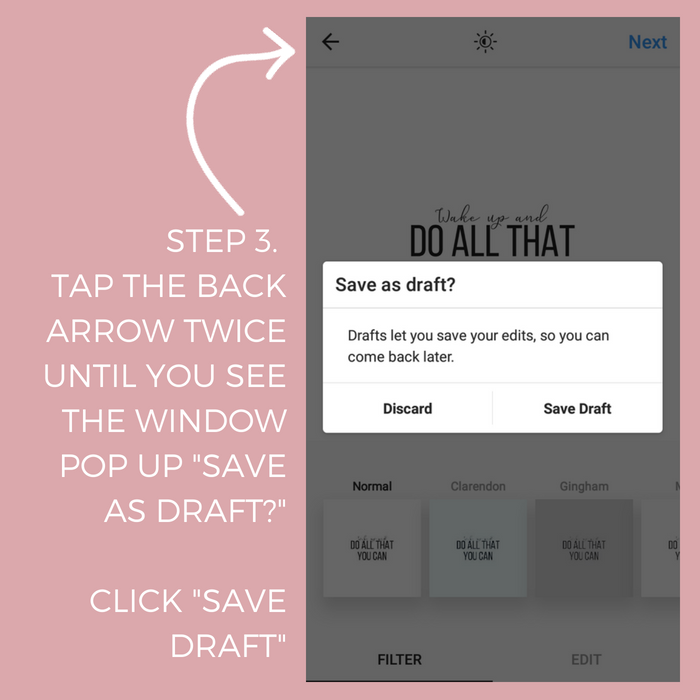
Step 3. Tap the back arrow until you see “Save as draft?”
Once you see the window pop up to save as a draft, go ahead and click “save draft”. This is going to place your image and caption into a draft area of the app for later use.
We’ll come back to drafts in the upcoming steps.
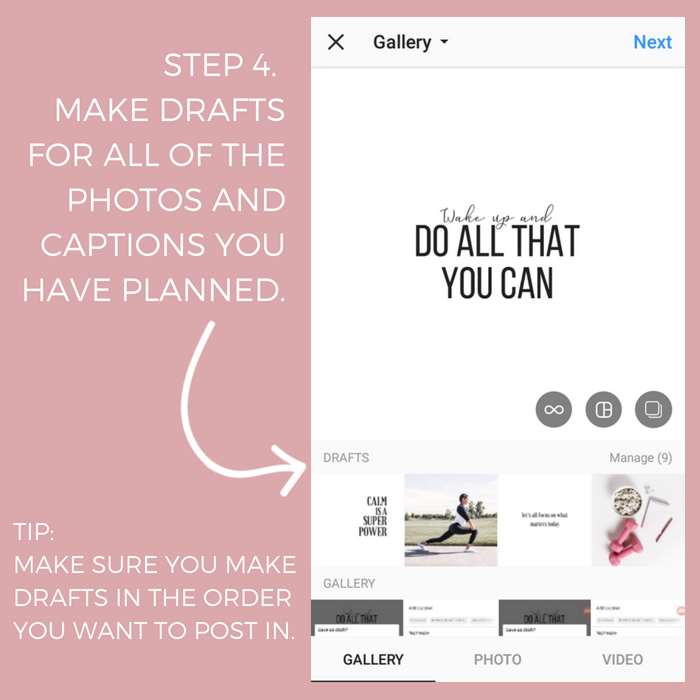
Step 4. Make drafts for all of your photos and captions (in the order you want to post them in)
You’ll want to try and save these drafts in the order you think you’ll post them in. This comes in handy on a future step.
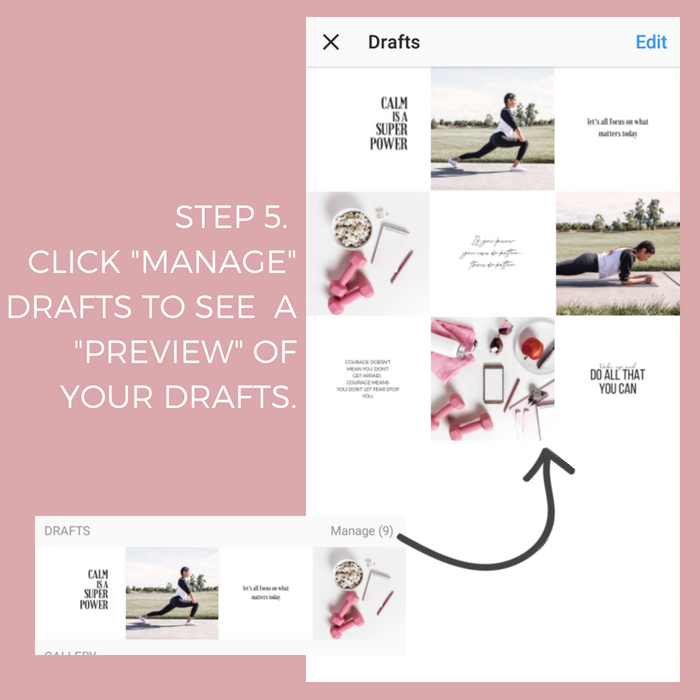
Step 5. See a preview of your Instagram content in the Instagram App (before you post)
This is where it gets fun! Once you’ve saved 3, 6, or 9 posts, you can click on “manage” to see a preview of what your drafts look like together in the native grid design.
NOTE! If you’re worried about saving too many drafts and not liking the grid layout you see, then I recommend stopping, after you’ve saved at least 3 drafts, to take a look at the preview. Do that after ever 3 drafts before moving on to save more and you’ll save yourself a headache.
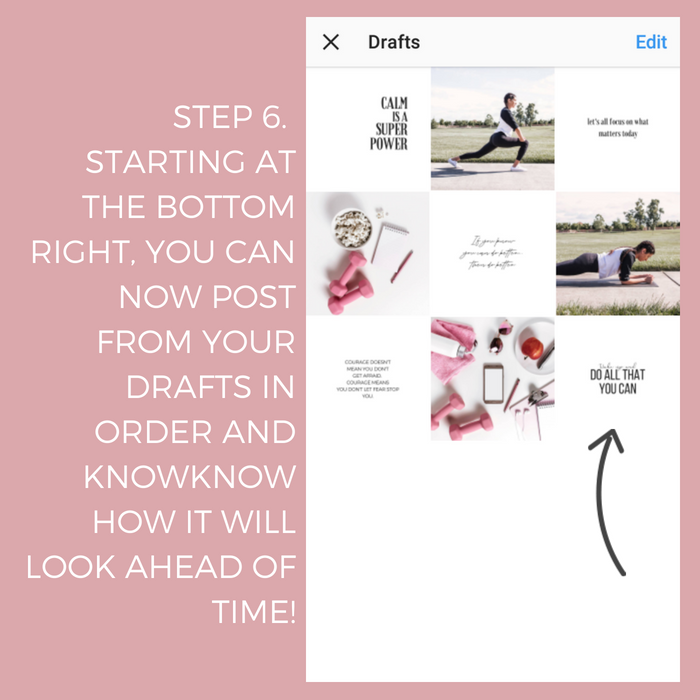
Step 6. Post your drafted Instagram content when you want to
Now that you have 3, 6, 9, or more drafts saved (with captions and hashtags) you can post them in order whenever you like – on the go.
No need for third-part apps cluttering up your phone.
To post a draft, just click on the image and it will take you to the share screen.
? Looking for more Instagram Tips and Tricks? Here are some of our favorites:
Plus, check out these Instagram tips:
Included Free:
550+ Templates, Photos, & Strategies
Get New Free Downloads Monthly
Unlimited Downloads
Special offers & Trends Newsletter
Save and sort your favorites
Access 500+ Free Templates, Photos, & Strategies With A Free Account
Free User Creation for Popup
By creating an account, I agree to Ivory Mix's Website terms, Privacy Policy and Licensing Terms
Already have an account? Log in
6 Comments
Leave a Comment
You must be logged in to post a comment.


Super neat! I downloaded another app but this method is simple. Thanks for sharing ??
You’re welcome. I know the apps can make it easy. I love a few of them myself. But this keeps it super simple.
Thanks so much Kayla! This is super helpful. I have tried several apps and they do part of what I want but to get to the really cool stuff I’d have to pay (which isn’t in the budget right now.) And that is kind of frustrating. It’ll be so nice to do what I need to do all in the Instagram app. This was awesome!
And I am so glad to help Daria! I’m all about paying for tools that help save time but there is a time and place for everyone and everything. This way in the IG app works out just as great! Have fun 🙂
I am about to start an account for my blog on Instagram, so this will come much in hand to create the feed I want 🙂
yay! I’m so glad this was a help for you 🙂