get 500+ free images, templates & marketing strategies! You're one click away, Don't Miss It.
How to create a mood board to inspire your blog and brand
This post may contain affiliate links. Please read the disclaimer
I’ve been an interior designer for over 14 years. Creating mood boards is basically … in-my-blood. I can create them in my sleep. I dream in them. I see things and am creating them in my mind everywhere around me. So, it came naturally to me when deciding on my own blog’s brand and colors. In fact, it was easy to create a ton of mood boards that were all very different from each other because I just love creating mood boards so much. However, my own personal style is eclectic, which means I like a lot of everything.
This made it very difficult for me to create a single brand identity for myself.
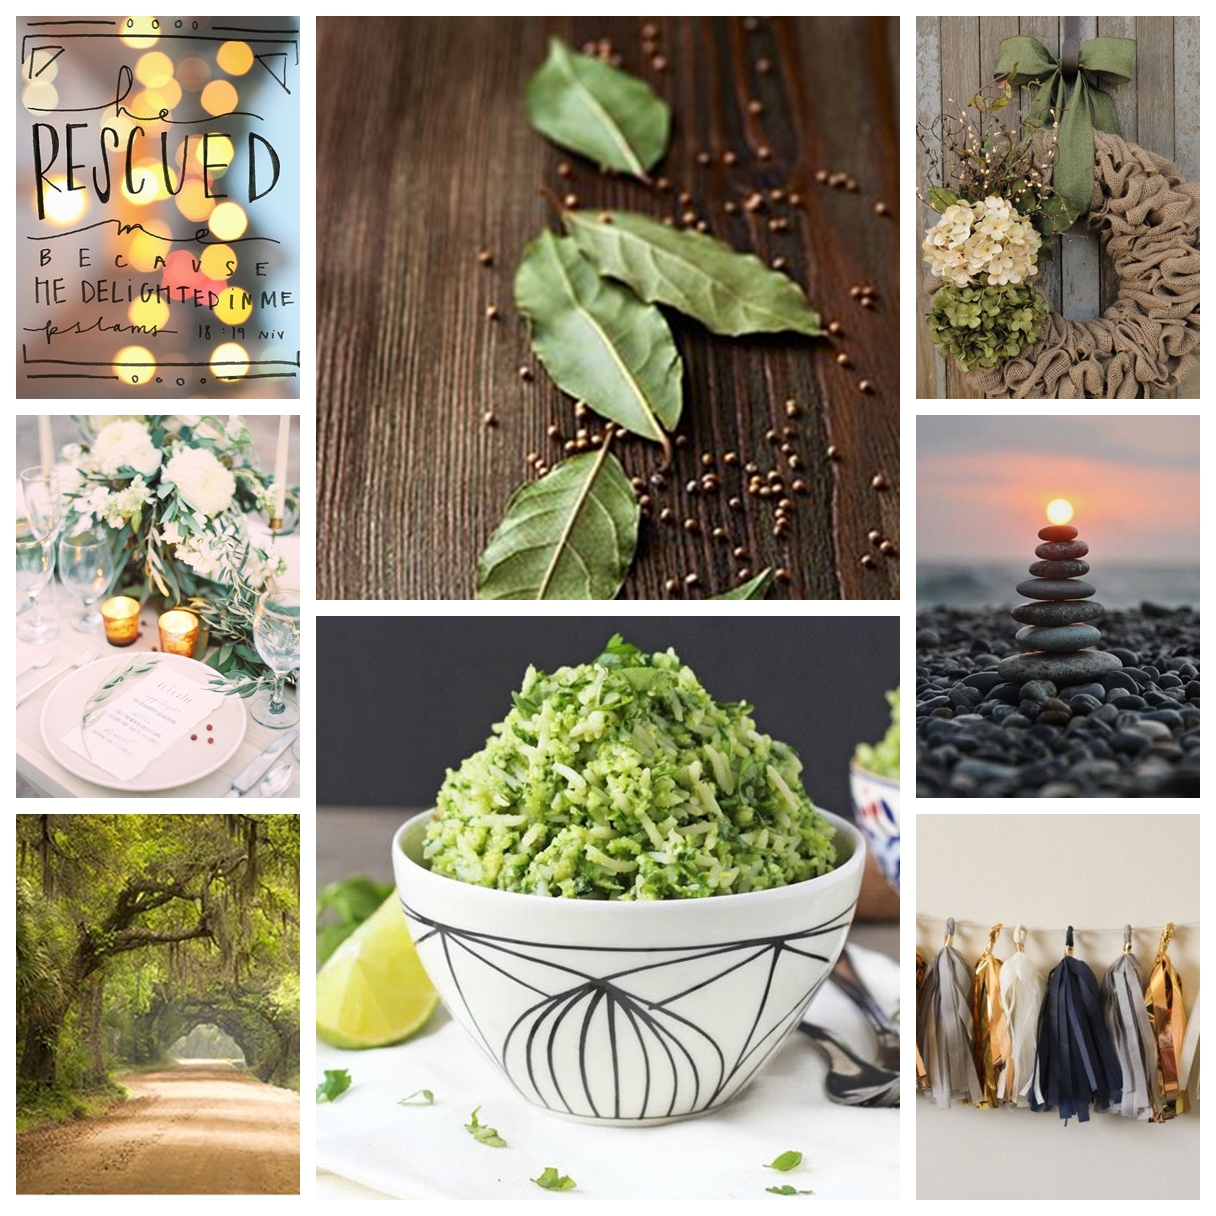
I had too many options to choose from and too many looks I liked. So, I had to stop creating mood boards and define what it was I wanted to achieve with my brand and blog. I had to define my audience and what they liked, more than what I liked. Just like designing my personal home interiors, it was difficult to design my own blog aesthetic, and I’m sure many web designers have the same issue for their own blog and websites. Here are some examples of the many mood boards I originally created a long long time ago before I got my act together.
That said, if you can afford it – get yourself a web designer or branding specialist. Or, find someone you trust for a second opinion at least. You’ll definitely need a sounding board for your ideas, and if you’re looking for other blogger opinions, you can always reach out and join our Rymixer’s exclusive Facebook group to chat with other bloggers.
For those of you who can’t afford the help of a web designer right now and are interested in doing a little DIY on your blog, I’ve got some key tips for how to create a mood board for your blog and brand inspiration.
What is a mood board?
A mood board is a tool used in many types of design (web design, interior design, architecture, and etc) to convey a design concept. It’s a sort of collage that can include:
Color Palettes
Fabrics / textures
Images (displaying types of filters and colors) / Lifestyle Photos
Fonts / Logo concepts
Examples of intended items to use ( like social media buttons)
Gather inspiration
Before you even begin to create a mood board, you should gather up all the things that inspire you, including images, colors, fonts and more. This may include things that are nothing like each other, but gathering all the things that inspire you will help you narrow down what you like and don’t like.
Decide on your demographics
Who are you writing your blog for? If it’s men who are 35 – 50 years old, then you probably should put down the pastel pink. Understanding who you are writing for and marketing to will help you go back to your “inspiration” you collected above and start throwing things out.
Having trouble understanding what your key demographics like and don’t like? Use your social media to poll your audience. Ask them directly which colors or images they like.
Mix and pair fonts
Understand that your blog can use a few different size and types of fonts, but that they should compliment each other. Play around with mixing and matching fonts to use for different occasions, but try and decide on only two. If you choose something very cursive or serif, then pair it with something a little more basic without a serif.

Do you need to create a logo? I wrote another tutorial on what to consider before you DIY your own logo.
Use a template
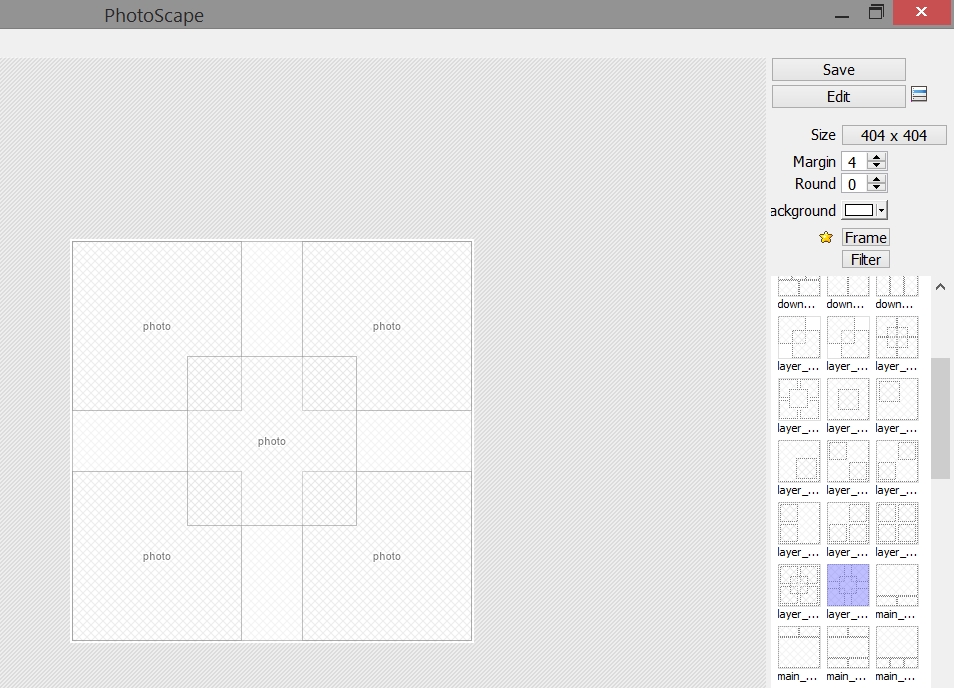
You can easily create a template for your mood board in a free program like Canva. I also like using the free photo editing software like Photo Scape to create image collages.
Pick one main image and color palette to guide everything
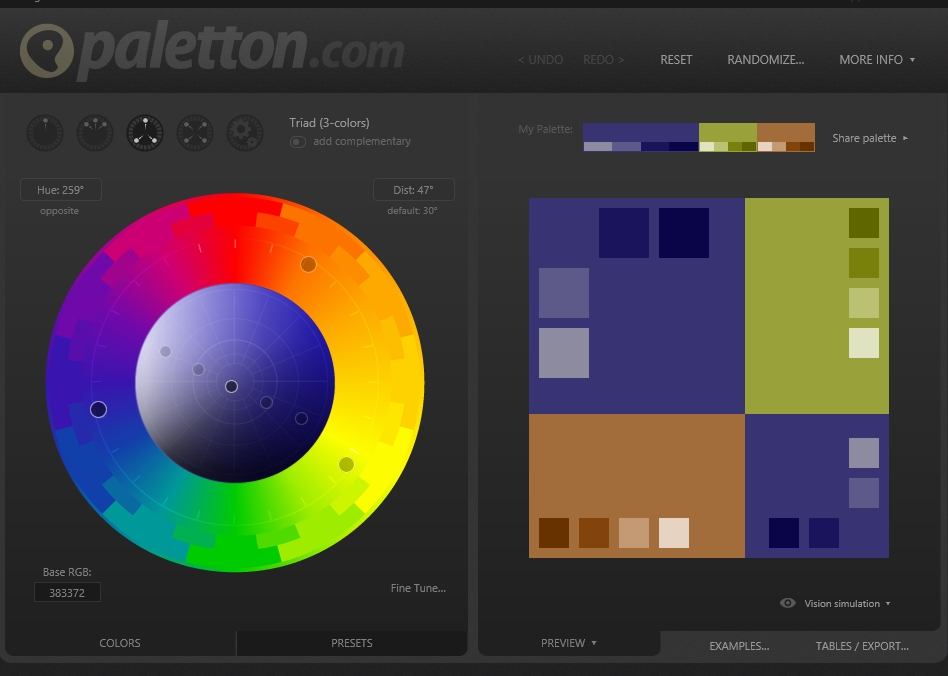
Once you’ve got your template ready, start choosing the main color palette and a single key image that will guide everything else you choose for your mood board. Color will be extremely important in your branding. Having a main color with a few supporting colors should be your focus. The supporting colors will not get used very often, but should compliment your main color.
A fun way to get color pallets is to use an image as your inspiration. Once you’ve chosen a main color, try using a tool like Paletton Color Scheme designer where you can find the complimenting colors to go with it.
Make multiple versions of your mood board
Once you get the hang of mixing and matching colors, images, and fonts – you should attempt to make at least 2 versions of your mood board and then run it by some people your trust. Don’t underestimate the power of having a mood board when you first start a blog. Having one will help to guide you and a designer in making decisions on other graphics you use on your blog and it will keep you focused on your brand and blog identity with many of the decisions you make.
Need some opinions on your blog and brand mood board? Don’t forget to join our Facebook group of fellow bloggers at the exclusive Rymixer’s Facebook group

Included Free:
550+ Templates, Photos, & Strategies
Get New Free Downloads Monthly
Unlimited Downloads
Special offers & Trends Newsletter
Save and sort your favorites
Access 500+ Free Templates, Photos, & Strategies With A Free Account
Free User Creation for Popup
By creating an account, I agree to Ivory Mix's Website terms, Privacy Policy and Licensing Terms
Already have an account? Log in
7 Comments
Leave a Comment
You must be logged in to post a comment.





This is so helpful, thank you!
Love these ideas lovely lady. I think that this is a great way to promote your brand. Keep up the great work and live unstoppable!
These mood boards are beautiful! And you have really great tips! Thank you!
Great post! Thanks for sharing this information!!! xoxoxo
Hope you’re having a great weekend!
~ Nicole
http://www.nicolevaidosa.com
Thanks for the tips! Passing them on to some blogger friends!
thanks for coming by and sharing!
LOVE THIS! When I started getting more serious about my blog, I hired a web designer and she created a mood board for me. Back then, I didn’t really understand the concept (I should have just googled it), so I didn’t benefit as much as I could have from it. Going forward though, I’ll be better prepared! 🙂
Lisa
http://www.theeverydayelevated.com