get 500+ free images, templates & marketing strategies! You're one click away, Don't Miss It.
How to use MailChimp – A Complete Tutorial for Setting it Up & Sending Emails
This post may contain affiliate links. Please read the disclaimer
When it comes to starting your blog and online business, one of the most confusing first steps is usually how to create and send a newsletter. I can completely understand the confusion because there are so many platforms and new lingo to learn. So, to get started it becomes important to learn the basics and first steps. In today’s post, you’ll find many answers to your burning questions because today is a complete Mailchimp tutorial. This tutorial includes a slew of screenshots, a videos, as well as complete and full instructions which would give you the insight into how to start a use Mailchimp. So, let’s get it started!
How to use MailChimp?
I hear this question alot. You’ll find a complete tutorial on Mailchimp has been provided below and it includes all the necessary information that will help you to get started. This Mailchimp tutorial and platform is often an ideal tool for new bloggers and entrepreneur who want to increase their online presence, and do it for very little.
Here are the reasons I recommend Mailchimp to beginners:
- MailChimp is one of the easiest systems that I’ve seen
- It is a little limited in features, but it has everything you’ll need to start. (great for beginners or intermediate users because I used it to grow my list up to 13,000 before making any changes)
- MailChimp is FREE for up to 2,000 subscribers (no other companies do free like this anymore)
- It has been around for a while, so integration with tools you use will likely be a synch.
- Creating a great looking email / newsletter is fun because of their drag and drop design
Everything you need to know to use Mailchimp shall be properly discussed.
So sit back, relax and grab a cup of coffee. The areas that will be covered include (shown in order):
- How to use “campaigns” and “lists” in Mailchimp (Create a list at :26 and create campaigns at
- Step by step instructions and where to create your first sign up form so you can send newsletters without special coding ( this is how you create a subscription)
- How to deliver a freebie and automated welcome email in Mailchimp
- How to create an email in Mailchimp and save it as a template.
- Explain the most effective method to send your first newsletter.
Now let us dive into the tutorial….
To start with, I might want to watch the video tutorial and so that you can get additional insight on what we are about to do. The tutorial contains virtually all necessary information that would be needed in setting up your account as well as making it easier to get started as I explain how to get things done.
MAILCHIMP STEP 1: HOW TO CREATE A LIST OF SUBSCRIBERS
Creating a list is essential, as this is the place where all subscribers are collected. According to your preference, you can create different lists. For instance, you can decide to create a list of clients as well as creating another for blog readers. All this simply implies that in order to gather email addresses in one place, you need to create a list.
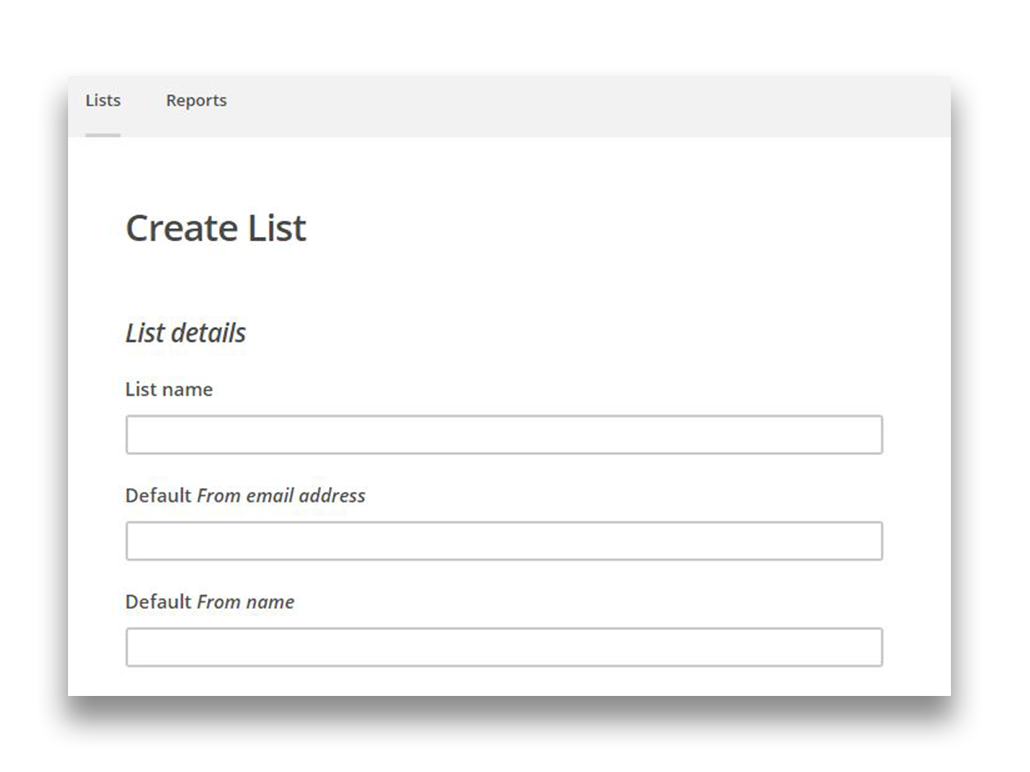
To do this first, click “Create List.” at the top right, found under the “Lists” menu item
Once the list has been created, you need to include all details for your list. Setting this up properly with help you in creating an effective newsletter down the line. So these details are asked for: the “from name” is what is included in the “from” field which your subscribers will see when your emails are sent to them. So you most likely need to include your name, or better still the name of your brand. For instance, I usually put “Kayla from Ivory Mix”. Including a means of contact such as your email address will also be necessary.
Do not be surprised if you discover that your address is here. It is indeed a legitimate prerequisite to attach your mailing address to every email sent. However, do not worry. I obviously won’t recommend giving out your home mailing address. Getting yourself a P.O. Box is a great option. Using a P.O. box can guarantee your privacy, and since they are relatively cheap they are usually an easy recommendation. You are not violating any law by doing this – don’t worry!
MAILCHIMP TUTORIAL STEP 2: HOW TO DESIGN YOUR SIGNUP FORM
Your list dashboard will be displayed immediately once you save your list, which gives you access to the list of your subscribers, a place to create a suitable design for your first signup form, and checking your newsletter statistics. So, let us now design your sign up form.
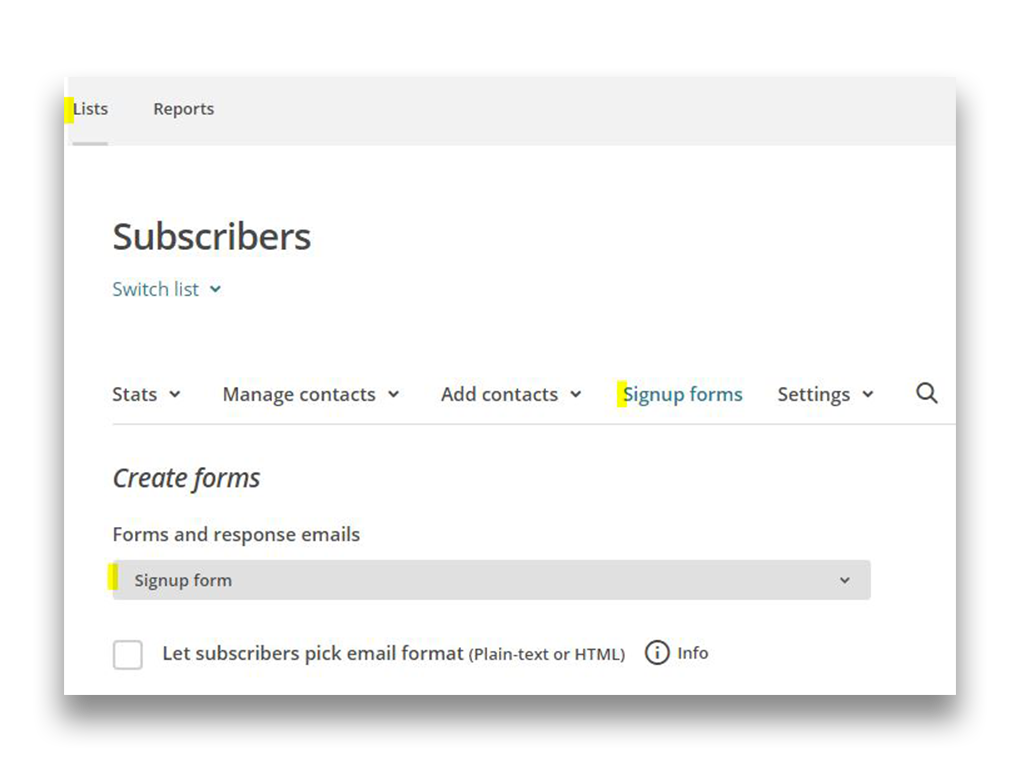
Once you see this page below, click “Sign up Forms” in the drop down menu and then “General Forms.” You’ll be taken to a page that looks like the screenshot below.
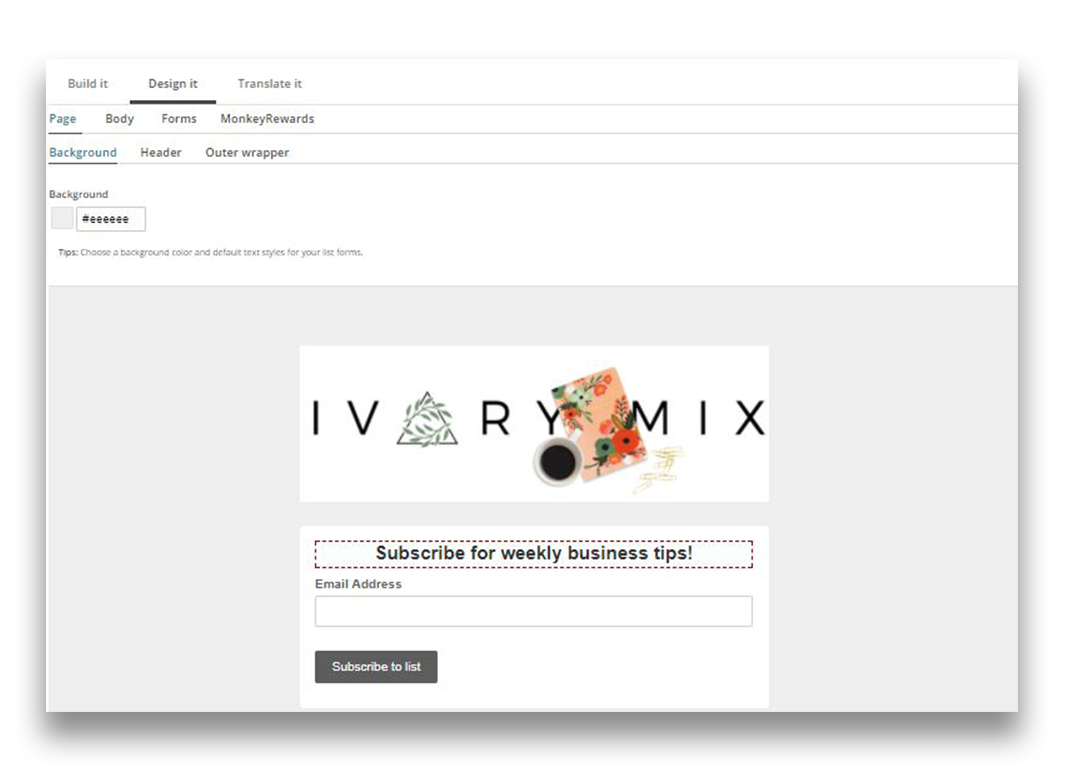
Once the step above has been followed, you can now customize your form. MailChimp is unique for this since it offers different features which can be used to change fonts, images, and colors. Customizing your from can also be done by clicking on the “Design It” button. Looks very easy right? The form below was designed in about one minute. All I did was to customize the fields and colors. I likewise made an on-brand header image to go at the top. Different software such as Canva or PicMonkey can be used. But I designed mine using Photoshop.
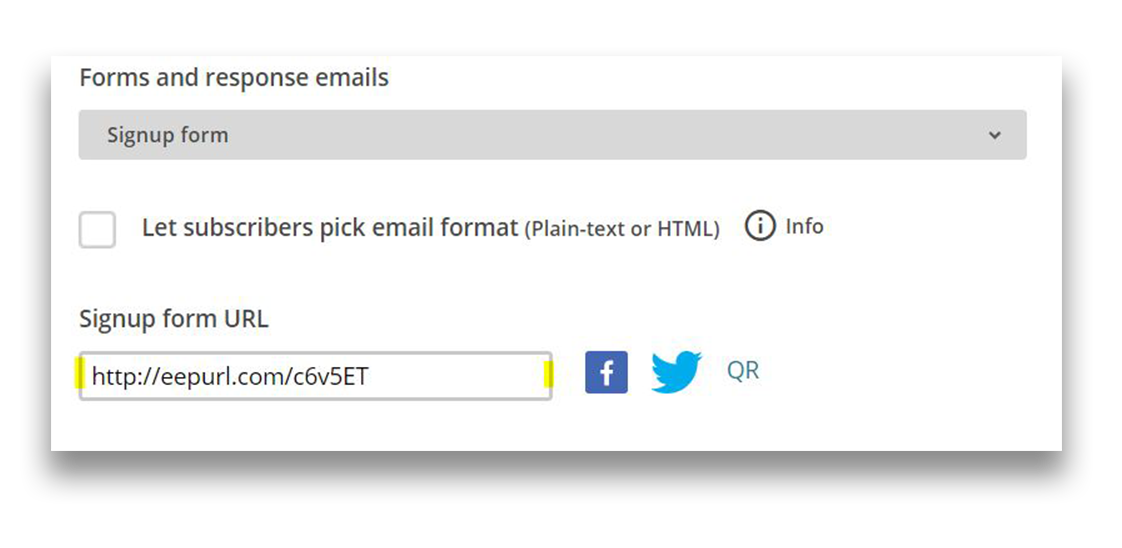
Finally, ensure you jot down the URL for your signup form. The reason is that this URL what will be posted on blog posts, in your menu on your website, and share with social media so you can encourage and drive traffic to grow your list.
MAILCHIMP STEP 3: HOW TO ADD YOUR FREEBIE / CONTENT UPGRADE (IF YOU HAVE ONE) TO YOUR WELCOME EMAIL
Most of the time, I do recommend creating a freebie and content upgrade if you intend to create an email list.
Why…and what is a content upgrade?
A content upgrade is more like an incentive offered to people that sign up for your list. Always try to offer something that would entice and convince your targeted audience to sign up for your list. Just be as creative as possible. And most importantly always make the interest of the targeted audience your priority. Offer something that your audience would certainly crave.
Let’s say you’ve created a PDF download as a content upgrade. In order to upload your content upgrade to your website, just upload it as you’d normally upload an image in the “Media” area of wordpress. Simply duplicate the URL from that new media file for future use and pasting in the welcome email, as this serves as a direct link to your freebie. To have a better feel, you can test run on your browser.
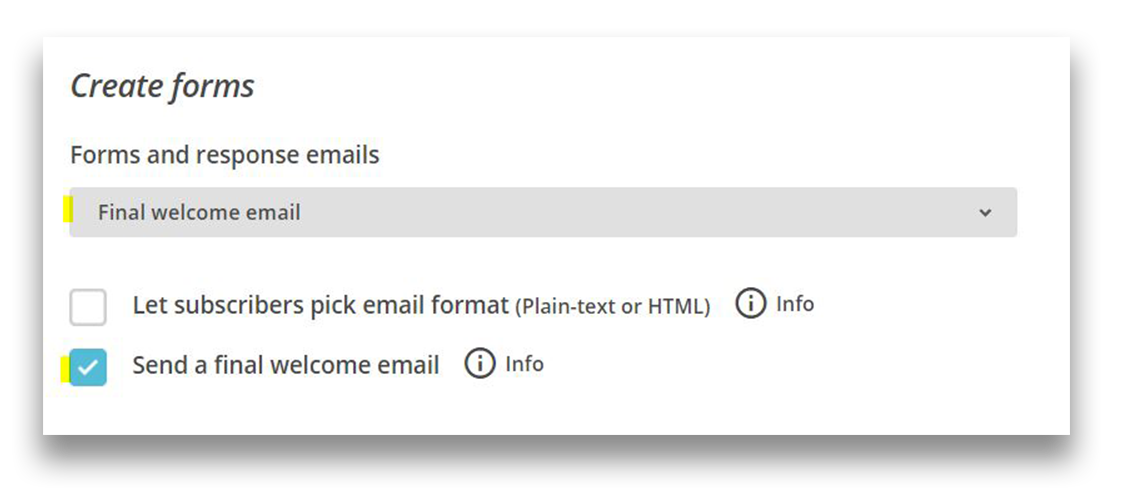
Now, let’s go back to MailChimp. Now, in the drop-down menu, click “Final Welcome Email,” as shown below.Make sure that you select the “Send a final welcome email” button or this feature won’t work.
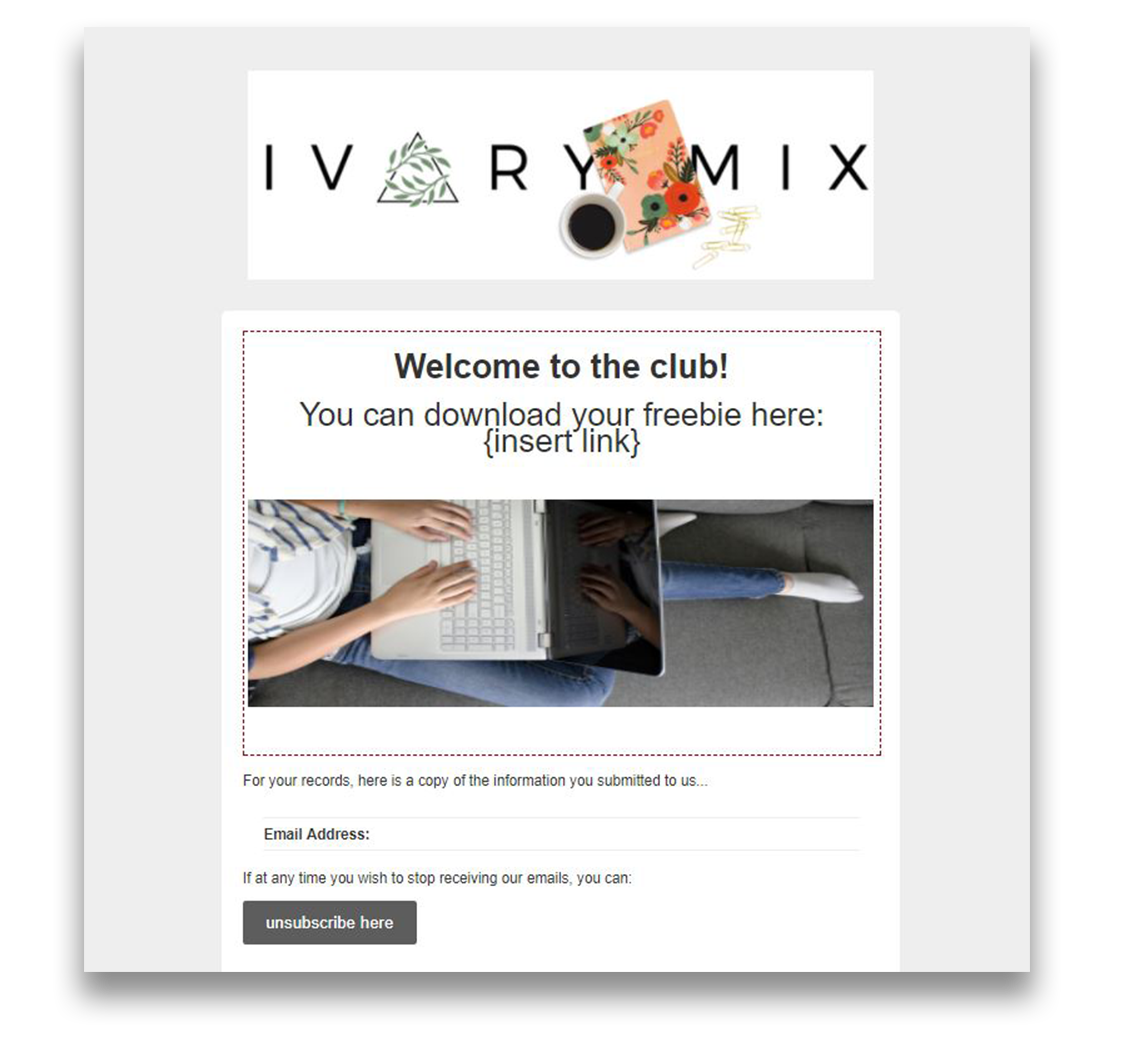
At this point, your welcome email content can be customized to suit your brand as well as your content upgrade and add anything else you would like. You can choose to seize this opportunity to give a warm and hearty welcome to your friends, share your freebie and maybe even welcome them to your private Facebook Group. Below is an example of what it should look like.
Don’t miss updating the “subscription confirmed’’ field it doesn’t tell individuals that the freebie they agreed to accept in exchange for their email is inside. Give them a pleasant welcome and an idea o what is inside the email.
MAILCHIMP STEP 6: HOW TO CREATE + SEND YOUR FIRST NEWSLETTER
Now sending your first newsletter is just about to begin. Click on the ‘’Campaigns” button at the top, then click on “Create Campaigns” button in the top right. Once this is done, you will be provided with different options on the type of campaign you want. As for me, I prefer to send a “Regular Campaign”. Then you will be required to choose the list you want to send and after that click the “Next” at the bottom.
At this point, you can now name your campaign, as well as make use of a fascinating title. However, this should not be an area of concern. Just basically concentrate on the subject for the time being. After crossing all hurdles, it is now time to design your newsletter.
Designing your newsletter just got easy by making use of the fantastic service offered by MailChimp. Customizing your email involves less stress and difficulty because MailChimp has a drag and drop editor. You have the privilege to select a template you want and that suits your needs adequately.
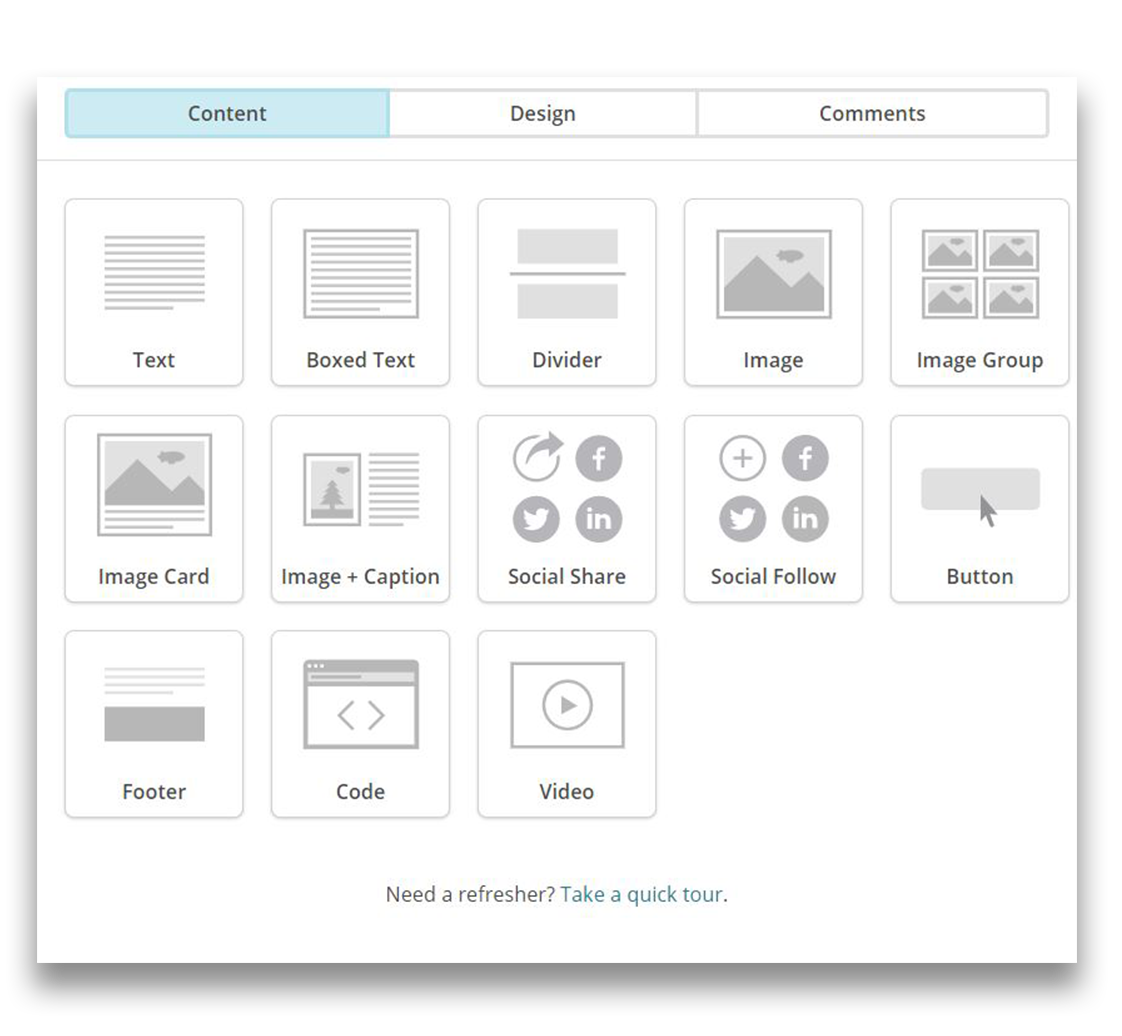
You can now start to add your content to it can design a logo by using tools specifically created for such purpose. An example includes Photoshop, PicMonkey or canvas. Placing your logo on the image at the top would be a good decision. Be that as it may, you can access a lot of options on the right such as the like buttons, dividers, etc. which can be dragged and dropped without so much of an effort into your newsletter.
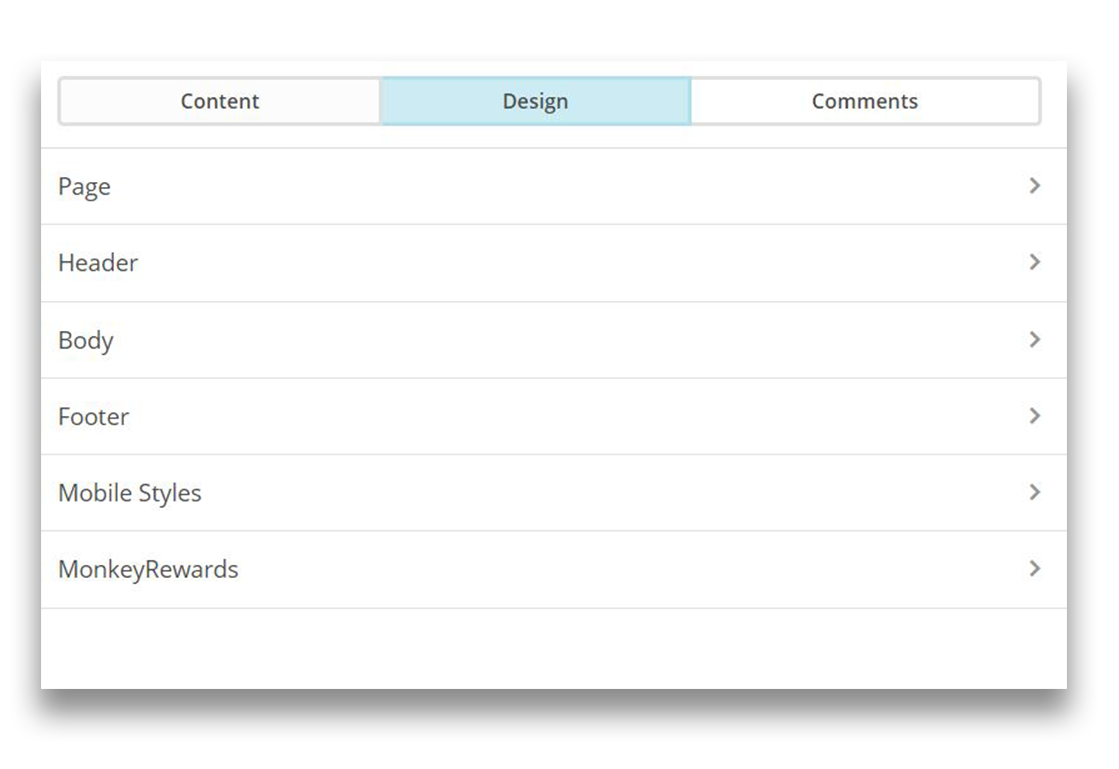
When on the “Design” feature you see below, you can decide more elements of you email, like which colors and fonts you’ll use in your newsletter. I usually recommend choosing something that matches your brand, but also keep it consistent from email to email. You want to use the same colors and font styles so that your audience begins to recognize your brand and email style. This will help you build lasting relationships with them.
Click on “Save as Template” at the top after creating a template. This would give your convenient access to the template when next it is needed. So you don’t have to go through the stress and hurdle of creating a new template each time you want to send a campaign.
Your newsletter can comprise of any information such as your product description, brand new advice or tips, links to new freebies you’ve created. A newsletter can basically be used for anything. At the point when you did including all necessary information in your campaign, you can then click on then click “Next” at the bottom, a go through the verification process to ascertain that everything is correct. Once that is done, click on the “send,” button. The newsletter will be delivered immediately or better still could be scheduled for a later date.
Woah! You have just successfully learned how to create an effective newsletter. If you would like to learn more, here are some more resources for gaining more skills with your email list building.
WANT TO KEEP LEARNING? HERE ARE MORE EMAIL TIPS:
Get emails through Gmail, using your own custom domain
4 Emails your reader can’t wait for you to send
5 Reasons you should not switch from Mailchimp to Convert Kit by Convert Kit* affiliate link

Included Free:
550+ Templates, Photos, & Strategies
Get New Free Downloads Monthly
Unlimited Downloads
Special offers & Trends Newsletter
Save and sort your favorites
Access 500+ Free Templates, Photos, & Strategies With A Free Account
Free User Creation for Popup
By creating an account, I agree to Ivory Mix's Website terms, Privacy Policy and Licensing Terms
Already have an account? Log in


