get 500+ free images, templates & marketing strategies! You're one click away, Don't Miss It.

Included Free:
550+ Templates, Photos, & Strategies
Get New Free Downloads Monthly
Unlimited Downloads
Special offers & Trends Newsletter
Save and sort your favorites
Access 500+ Free Templates, Photos, & Strategies With A Free Account
Free User Creation for Popup
By creating an account, I agree to Ivory Mix's Website terms, Privacy Policy and Licensing Terms
Already have an account? Log in
How to customize and edit stock photos (change colors, remove objects, etc)
This post may contain affiliate links. Please read the disclaimer
I know that sometimes, although stock photos can be high-quality, well styled, and look great, they can still lack the something that YOU need in order to make them truly work for your brand. So, I want to help you get the most mileage from your stock photos that you can. Even the ones that aren’t perfect for your brand – yet.
Now, before we start, I should say that this is NOT a tutorial for creating your own photos or using professional programs like Lightroom or Photoshop.
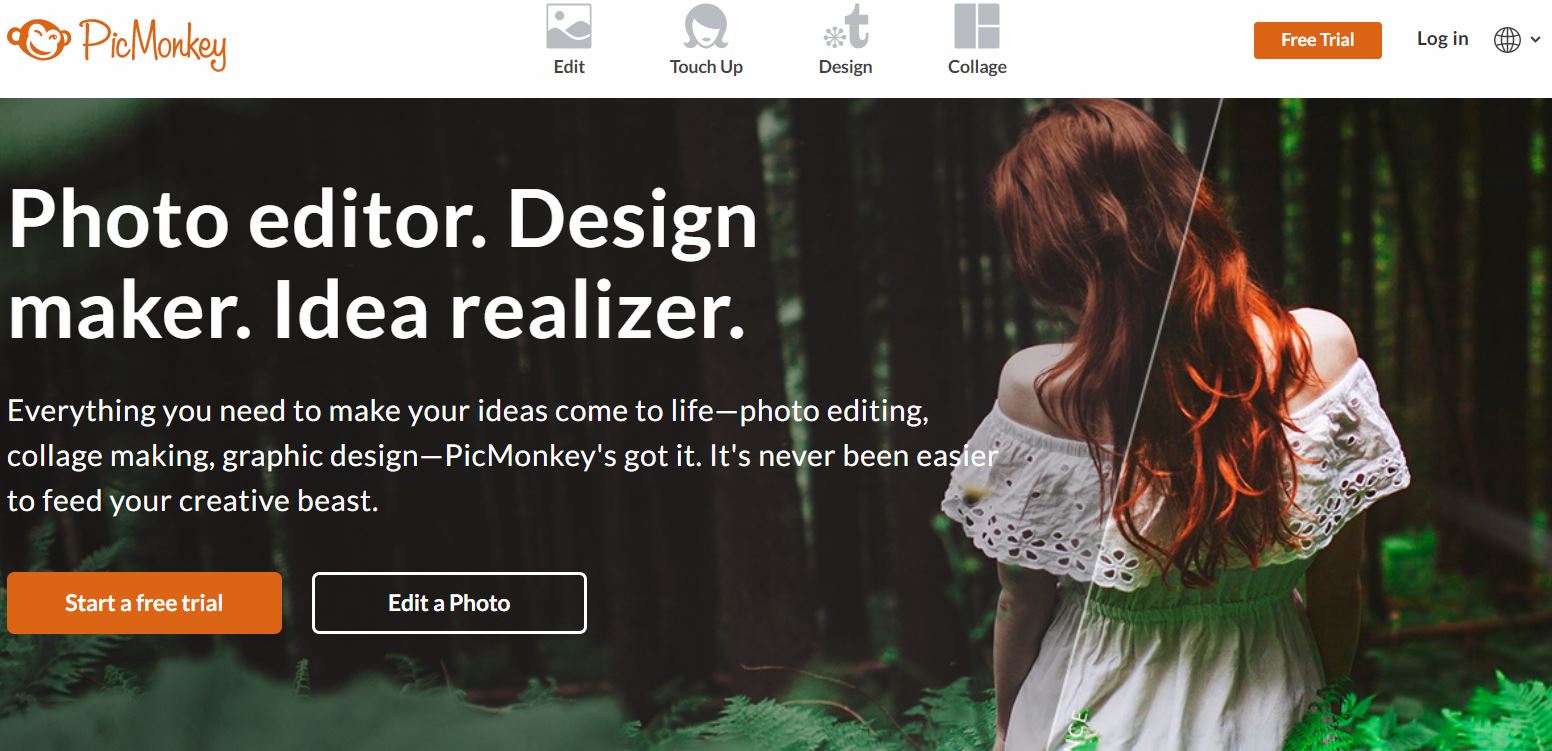
I know that you might not yet be ready to jump into those, so today’s tutorial is using the editing tool from PicMonkey. I should mention that this post contains affiliate referral links.
How is PicMonkey different than Canva (and are both better than Photoshop)?
If you and I have been chatting for any length of time, you probably know that I love Canva and I use Photoshop. I even created a free course teaching how to use Canva as your Graphic Design program.
So, why aren’t I teaching this tutorial with Photoshop or Canva?
Well, first, there are endless photo editing and graphic design options out there and I had to choose one.
But, I chose PicMonkey for this tutorial for reasons that are multi-faceted:
? PicMonkey has many tools and functionalities for photo editing that Canva just doesn’t have. Like Cloning and erasing! (You’ll see these in action in a moment)
? It’s web-based, has a user-friendly interface, and has free on-the-fly photo editing you can try (if you just click ‘edit a photo’ on their home page, you can edit a photo for free – but as of 2017, you won’t be able to export it)
NOTE: PicMonkey is no longer free to export, so you will not be able to export or save your photo changes unless you grab their free trial. You can, however, try this tutorial and access their tools without signing up for the trial.
– PicMonkey is not just a graphic design tool or Photo editor. It’s both. (plus, word on the street is that they’re adding a desktop version soon)
– Both of their ‘premium’ and ‘supremium’ versions cost less than Canva for work. (PicMonkey has options as low as 5.99/mo. Canva for work and Photoshop’s lowest monthly option is just shy of $10/mo)
So, you can see that these are all things you might be interested in and I figured it would be good to show it in action.
Click here to start your free trial of PicMonkey and take it for a test drive. Why not use this trial to compare it to Canva!
Don’t worry if you don’t want to try the free trial – – If you just want to follow along and make these edits with me, you can simply click ‘edit a photo’ on their homepage instead of free trial and you’ll be able to do everything I am doing in this tutorial.
NOTE AGAIN: PicMonkey is no longer free to export, so you will not be able to export or save your photo changes unless you grab their free trial. You can, however, try this tutorial and access their tools without signing up for the trial.
Here’s the full video tutorial:
How to change the color of objects in stock photos using Pic Monkey ?:
When it comes to editing stock photos to better match your brand, the first thing that comes to my mind is color.
Using PicMonkey’s tint tool, you can change the color of objects pretty easily.
- Step 1. Go to Effects>Paint Box>Tint
-
Step 3. Choose your desired color
-
Step 3. Click the paintbrush and the “Paint Pallet” box will pop up
-
Step 4. Click the “Reverse effect” checkbox and start painting over the objects you want to change the color of
This takes some practice, but it’s easy to erase mistakes you made by clicking back and forth between “effect” and “original” or change the intensity of the color by sliding the “Fade” left to right.

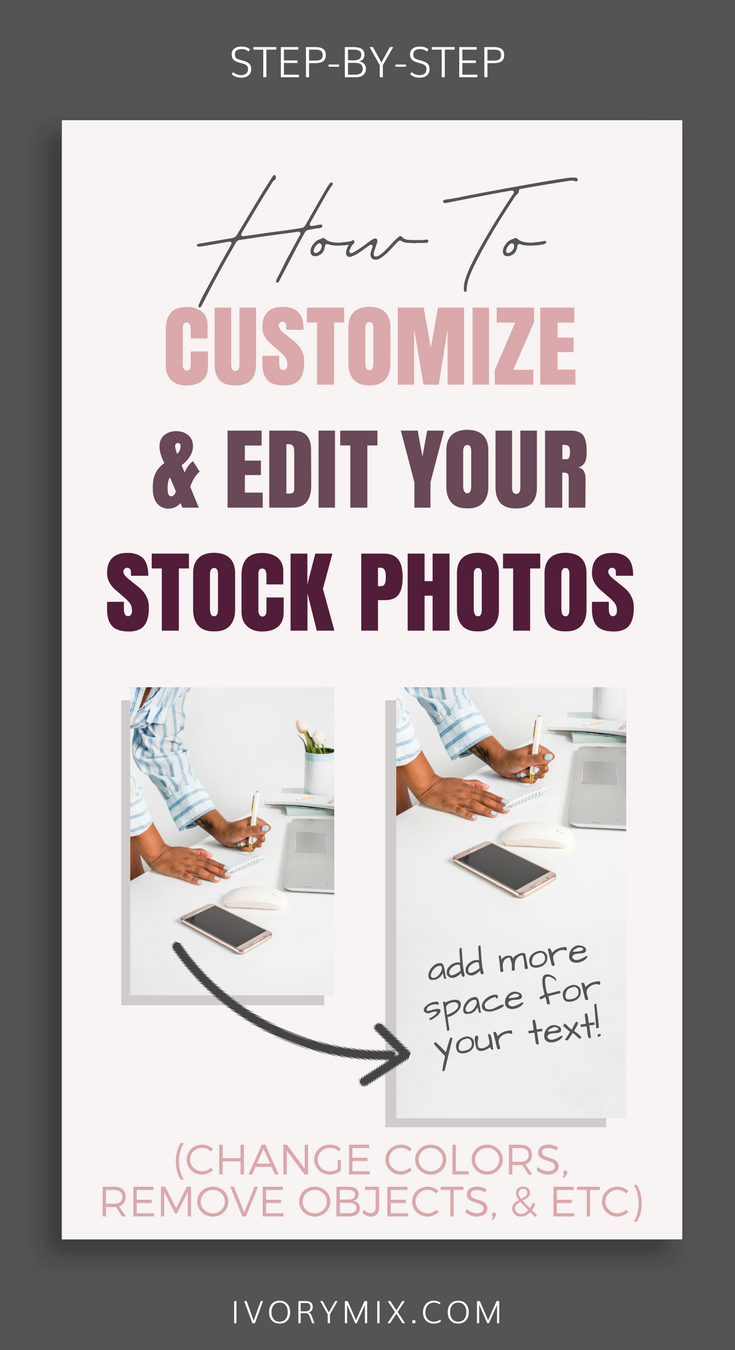
How to add more “negative space” to a stock photo for more text area using Pic Monkey ?:
One thing that I know will come in handy is being able to add more photo to your photos. Why? Because sometimes you just need a little extra negative space for text. This feature is nice when making a photo taller for Pinterest images:
- Start with a blank canvas large enough for your Pinterest Image (750 x 1350 for a really tall one)
-
Add an overlay and choose the photo you want to use
-
Flatten the canvas and overlay layers so you have one background layer
-
Go to the clone tool is located under Effects > Advanced > Clone.
-
Using your cursor, you first select the “source” by clicking the color or pattern you want to replace the white canvas with
-
Then, you slowly and carefully paint over the white canvas until it looks like one seamless photo.

How to erase unwanted objects from a stock photo using Pic Monkey ⚡:
Sometimes, photos can contain objects that you would rather remove. The “Clone” tool in PicMonkey can be used for many things like removing blemishes or unwanted lint on a sweater in your photos. But, you can also use the clone tool to remove entire objects too.
It works best when the background is simple:
⚡ Go to the clone tool is located under Effects > Advanced > Clone.
⚡ Using your cursor, you first select the “source” by clicking the color or pattern you want to replace your object with.
⚡ Then, you slowly and carefully paint over the object. It’s cloning the color you chose and placing it on your object.
You can see that it’s best to have a solid color or repeat background for this tool to work best for you!

There you have it! Three MORE ways that you can customize a stock photo for your brand.
Click here to start your free trial of PicMonkey and take it for a test drive.
Was this helpful – Looking for more tips? Leave a comment.
Plus, check out these other tips and tricks for customizing your stock photos:
Included Free:
550+ Templates, Photos, & Strategies
Get New Free Downloads Monthly
Unlimited Downloads
Special offers & Trends Newsletter
Save and sort your favorites
Access 500+ Free Templates, Photos, & Strategies With A Free Account
Free User Creation for Popup
By creating an account, I agree to Ivory Mix's Website terms, Privacy Policy and Licensing Terms
Already have an account? Log in
5 Comments
Leave a Comment
You must be logged in to post a comment.


This is great, Kayla! Thank you so much for teaching us how to do this.
My pleasure! Always,
Thanks for teaching us how to manage this type of modifications on our own even if we are not gifted for design.
It’s my pleasure! Glad to know it helps.
Hey. Great tips! I’ve always wondered how to do this and could never get it quite right. Thanks!