get 500+ free images, templates & marketing strategies! You're one click away, Don't Miss It.
How to get started and stay organized on Canva
This post may contain affiliate links. Please read the disclaimer

As a content creator, a business owner, and someone who uses Canva all the time, I know how disorganized Canva can get if you don’t set it up with the right organization system.
In today’s post, I want to do is walk you through my simple system for keeping Canva organized so that I can find everything when I’m looking for it.
Want to skip the read? Watch the video here
STEP 1. Set up your Brand Kit
Save Your Brand Colors
As a designer, it is important to use your colors consistently and know how to use colors wisely. Colors are one of the most powerful tools in design. They can evoke an emotional response, create moods, and establish character.
Pick your colors and place them into your brand kit so you can access them through the designing process.
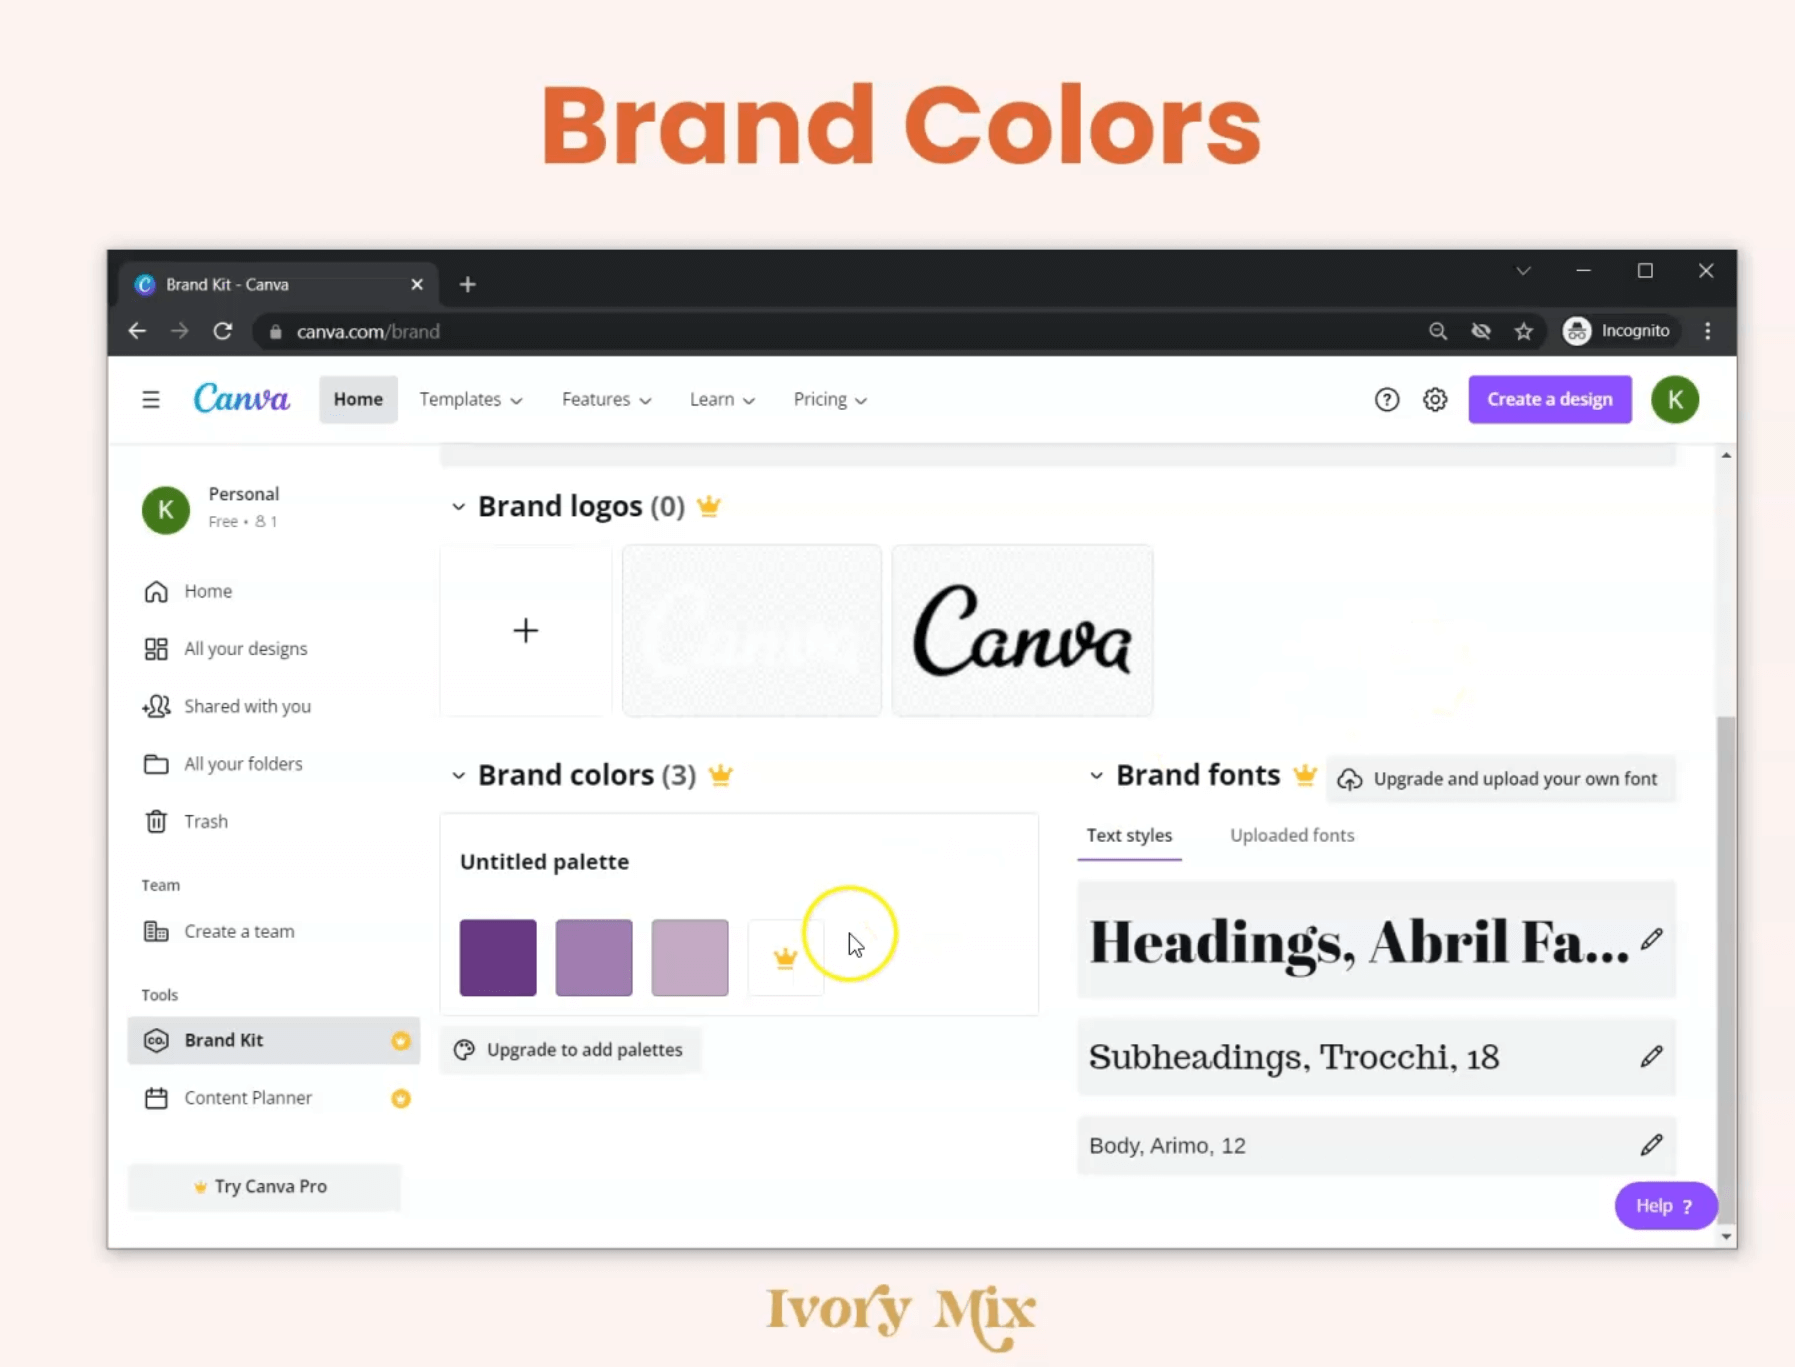
Pro Features: Add Your Logos and fonts
You’ll need Canva pro to set up the rest of the brand kit with your logo and fonts. You want your logo and fonts easy to access through the design process.
Once you have these two elements, you can then add other elements to the next step when setting up your folders, such as textures, patterns, and images that will help you create a cohesive look for all of your marketing materials.
STEP 2. Set Up Folders
When you have a free Canva account, you are provided with 2 folders and you should use them! Folders and organizing templates and files in them will help you stay more organized.
When you have a lot of images, elements and templates, it can be hard to find what you are looking for without them.
You might spend hours searching through your designs looking for specific templates. But when it’s in a folder, you can easily find it and move on to your next task without having to spend time scrolling through your computer screen.
I recommend 2 essential folders for Free users:
- Brand elements
- Templates
File 1: Brand Elements
This would a folder where you would upload your files and brand assets like logos, patterns, headshots and other files you use in branding.

File 1: Templates
This file organizes your templates that you would use over and over again.

File 3: Content/Marketing (Canva Pro Feature)
In this folder, you would save and keep your working templates for ongoing projects, content, and your marketing. This is optional for users who have a Canva Pro account.
If you don’t have Canva Pro, you can save your working documents in your templates folder OR combine your ‘Brand Elements + Templates’ into one folder, and use your 2nd folder for ‘Content/Marketing’.
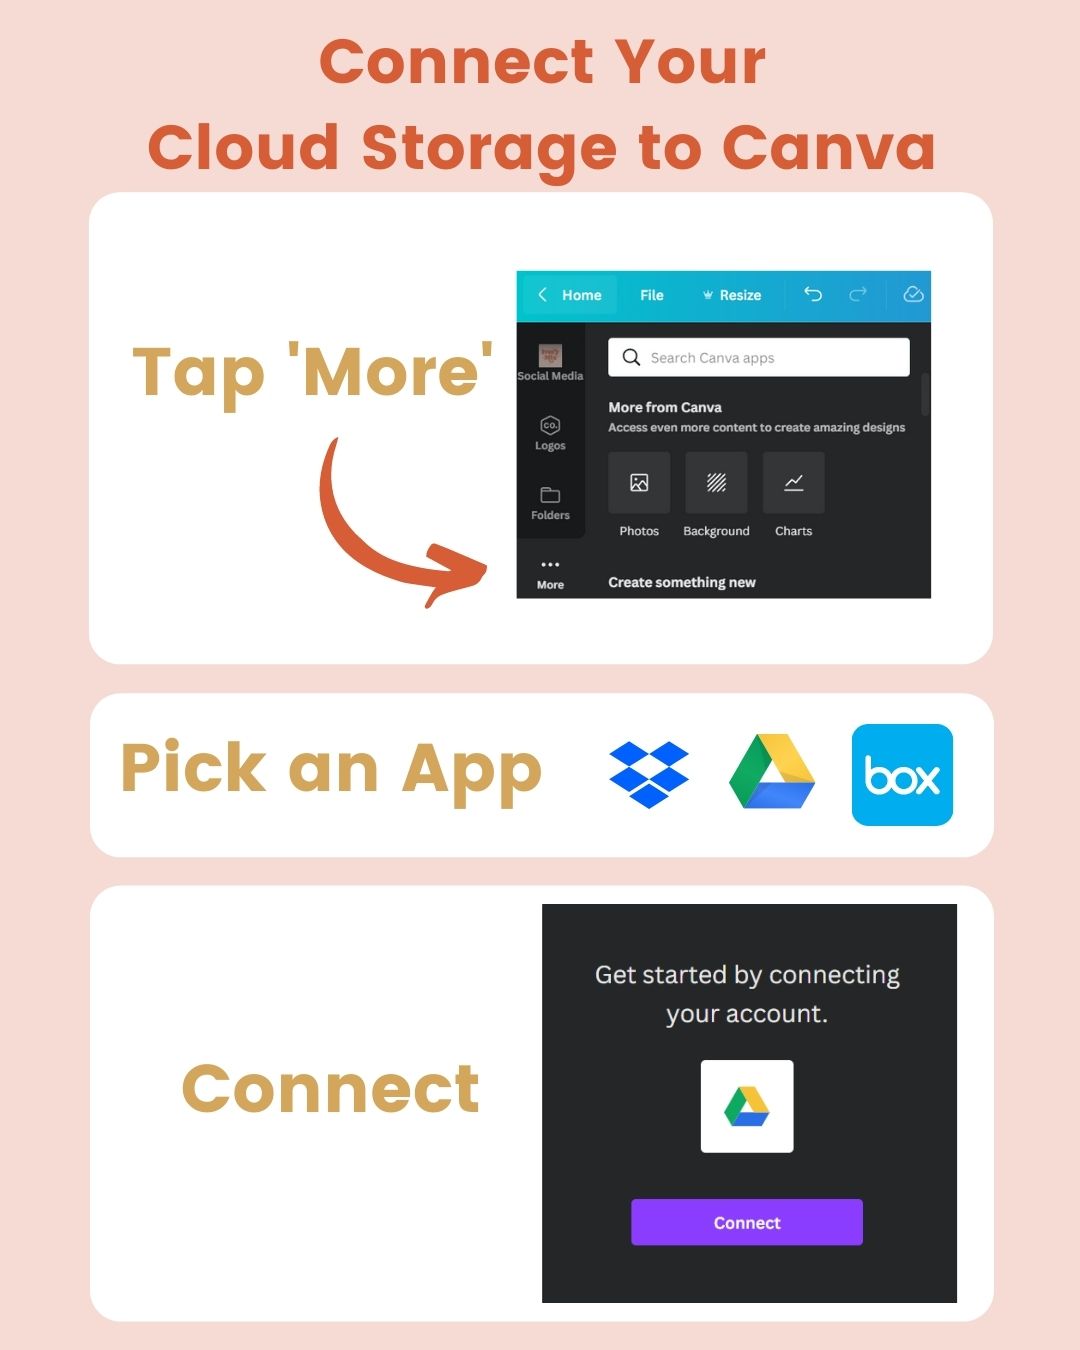
Step 3. Connect your external storage (Google Drive, etc)
One of the best ways to expand your organization and storage is by connecting any external storage you already have.
You can connect your Google Drive through ‘more’ apps on the left side of your Canva Design Menu.
This is especially a great feature for you if you store stock photos or stock videos from other sources, like our Ivory Mix Membership.
Step 4. Stay organized when you are designing from desktop
Once you have everything connected, you’ve got your folders organized, and you’re ready to start designing from desktop. This might be something that you’re already very familiar with but if you’re not very familiar with Canva, then your next step is going to be designing with a template.
Start with a template
Templates are a great way to get started with using canva and you can find templates up in the top left corner and actually search for templates or look for their recommended templates that you can use
Search through Ivory Mix Templates
If you’re part of our ivory mix community, search through Ivory Mix to get your hands on Instagram templates, Pinterest templates, and more to create a cohesive environment for your social media and your social presence.

Organize your favorite Canva Elements with the Star (save)
With a free Canva account, you can easily upload your elements or your media whether that’s images, videos or audio right through the design canvas, but you can also discover other elements and things inside of Canva.
There’s a way to organize elements you discover and want to use regularly by using the star icon. If you find something in the elements that you like, you can click the three dots on that element and hit star. This is going to save that element in the stars tab so that you can access these things regularly.

Save and Apply Filters and Effects to Photos
Another way to stay organized within Canva is to apply the same filters and effects to photos.
You can do that by copying and saving the filter code on a photo. You’ll have to place that code on a document or your keyboard outside of Canva, but it’s a great way to save your photo edits and use and reuse them on future designs and projects.
Start designing from your phone, Easy editing from your phone, Post from your phone
Instead of always using Canva on the desktop, remember that you can also design from your phone using the Canva App. It makes it easy to design on the go, edit, or even publish posts from Canva from your phone
Step 5. Share to social straight from Canva
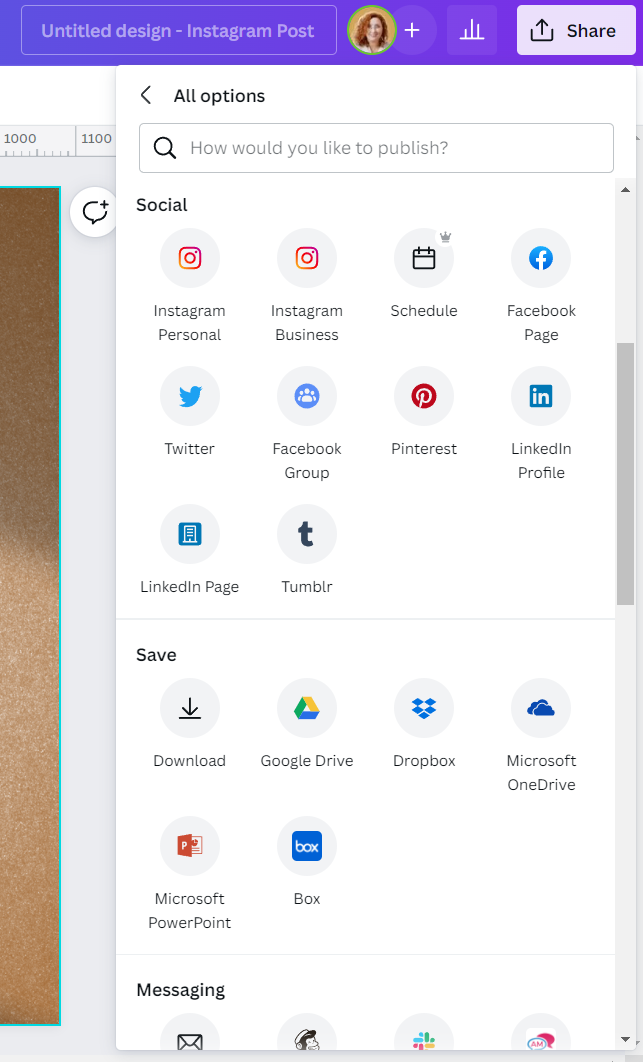
You don’t have to download everything you make. You can use your Canva account to share directly to social media.
You just go to the three dots at the top of a design and look for the share title. There you can find all kinds of platforms and social media that you can share your designs to. This simple step can really simplify your process and help you work smarter and not harder.
Step 6. Canva pro and Scheduling
There is a lot you can do with a free Canva account, but organization and content creation gets a whole lot better when you become pro.
Resizing
One of the best things you can do is resizing templates in one click. This is a great way to save you time in your workflow because you can resize any design into another size instead of having to re-design it.
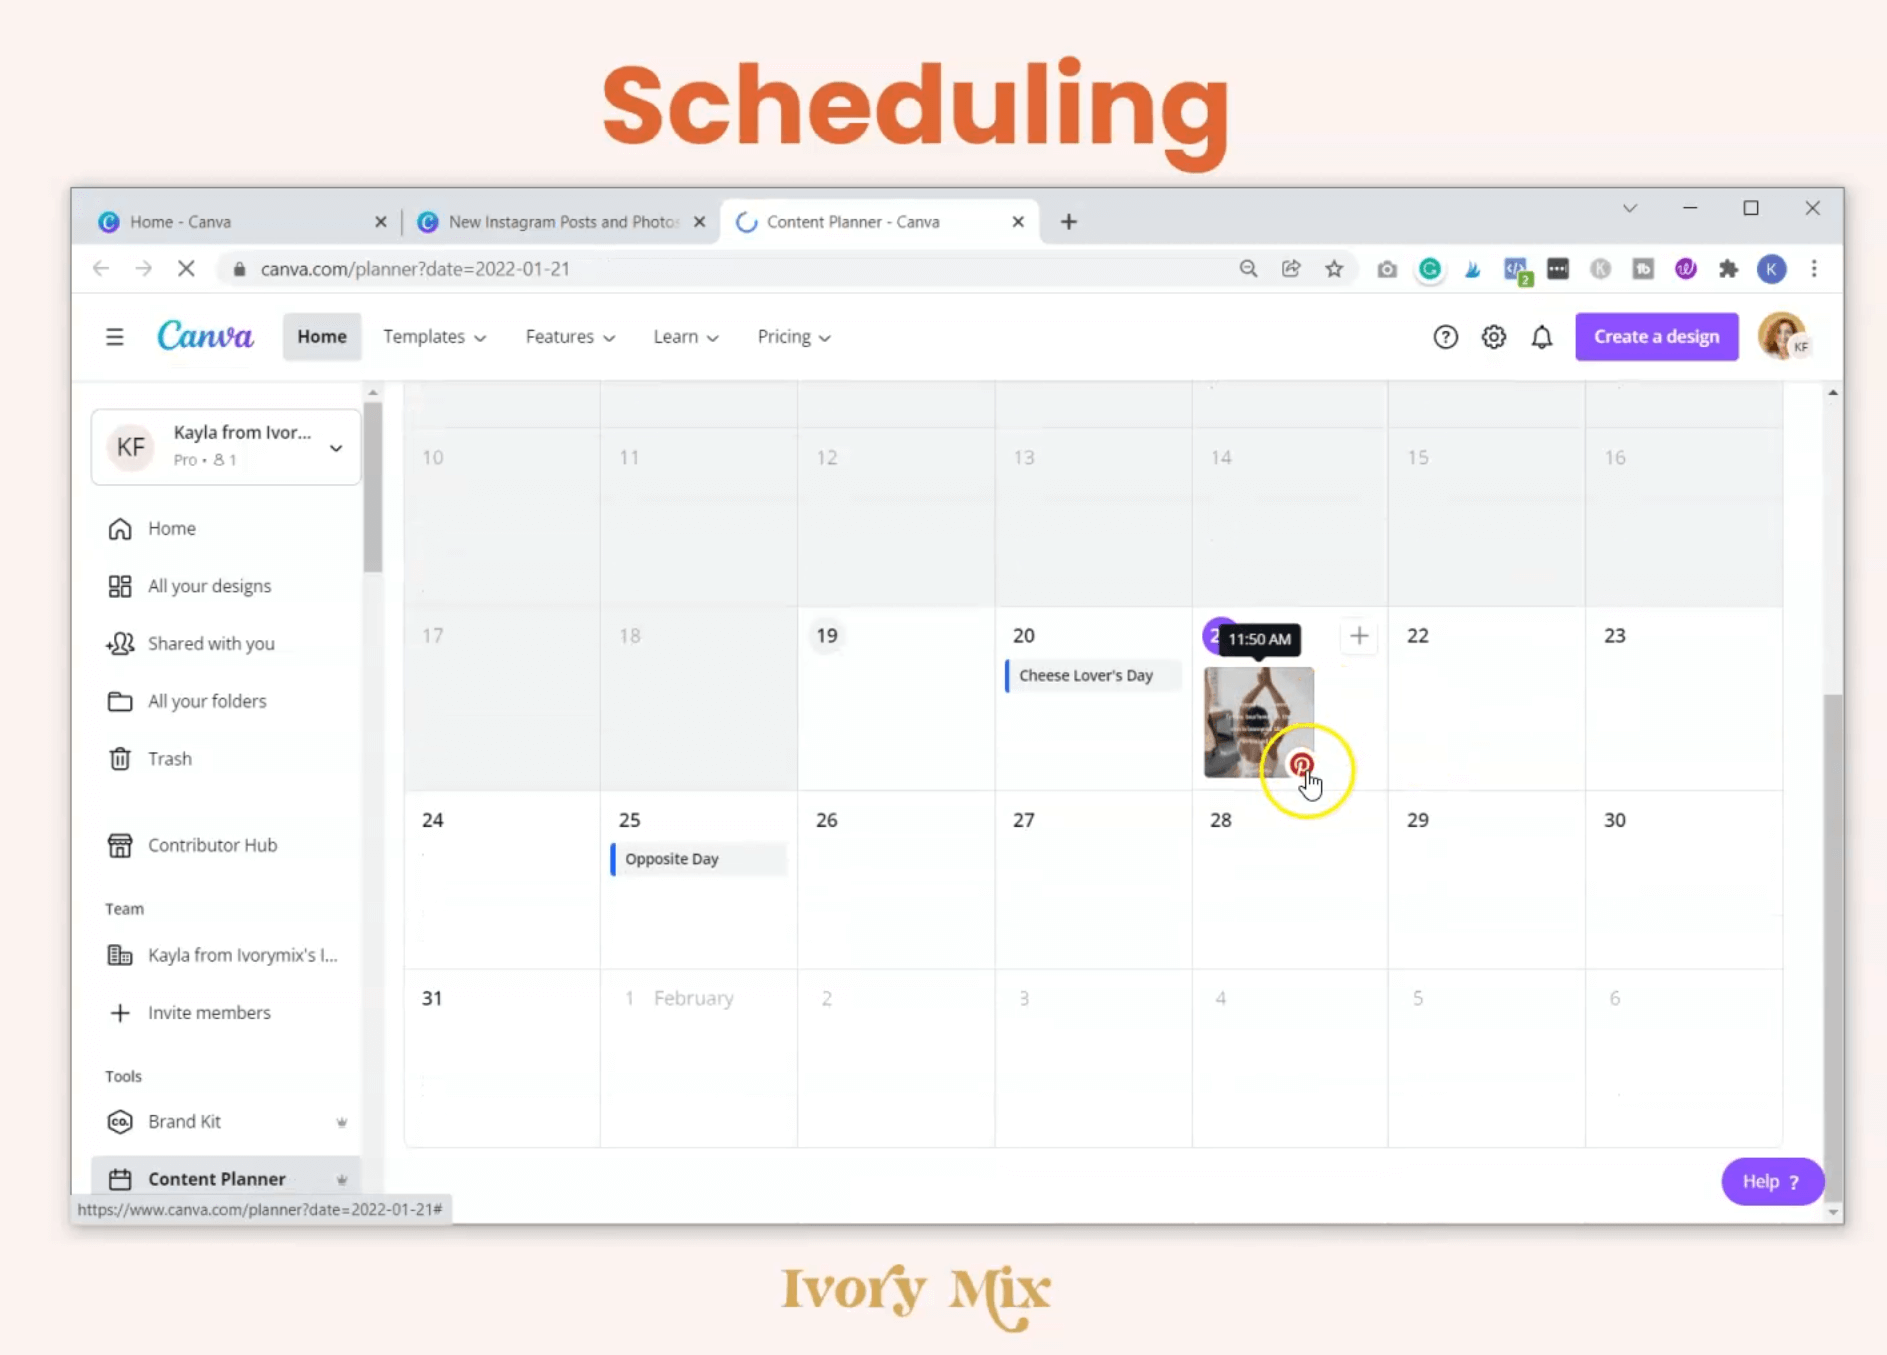
Scheduling
Scheduling is a great way to stay organized with Canva because it keeps your content schedule and your content creation all on the same platform. When you want to schedule something you connect the platform and schedule it on a date and time. Once it’s scheduled, you can access and view all of your scheduled content from one place.
What Next?
You’re all set to start using Canva and keeping it organized!
What Next?
Want to learn more about Canva? Click below to learn more from our latest articles.
- Stop making these mistakes on Canva
- Repurpose Any Content with Canva
- Create a customizable Instagram bio link in Canva
- How to create your website for free in Canva (pros and cons)
Ready to make Content Easy? Join The Content Membership
Join the most comprehensive content membership of stock photos, Canva graphic templates, captions, and marketing resources built to empower busy creative entrepreneurs so they can easily and confidently create content that grows traffic, leads, and profits in their business.

Included Free:
550+ Templates, Photos, & Strategies
Get New Free Downloads Monthly
Unlimited Downloads
Special offers & Trends Newsletter
Save and sort your favorites
Access 500+ Free Templates, Photos, & Strategies With A Free Account
Free User Creation for Popup
By creating an account, I agree to Ivory Mix's Website terms, Privacy Policy and Licensing Terms
Already have an account? Log in


